Friday, July 31, 2009

Snowflake Beach Designs Creative Team

It's official---I was selected to be a member of the creative team (CT) for Snowflake Beach Designs. So I get to wear this:
CT Blinkie
Yay!

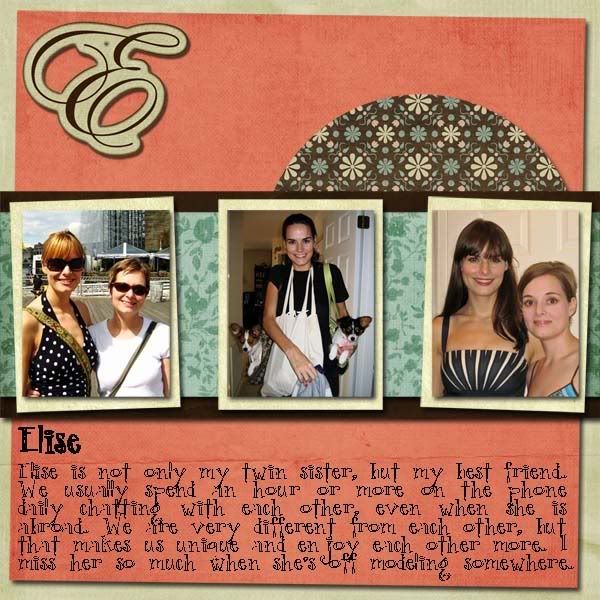
It's a good week---my twin sister and I turn 30 tomorrow. Unfortunately she's in Turkey right now so we won't be able to celebrate this milestone together. I miss her. My parents are coming down to visit, and my dear hubbie is baking a strawberry cake and making chocolate ice cream. If the weather isn't too miserable---it's very hot and humid---we are going to go see the cypress trees that grow locally. My dad has never seen them. We live near the northern most stand of cypress in the United States. They are beautiful.

I hope you have a wonderful weekend!

Monday, July 27, 2009

So Wonderful

I am trying out to be part of the creative team at Snowflake Beach Designs. To do so I had to come up with two layouts for her most recent kit. And that's what I wanted to show you. They are below.
alternative text

So Wodnerful
Credits: Kit - "So Wonderful" by Snowflake Beach Designs; Photo - Morgan Taylor; Fonts - Century Gothic, & A Little Pot by kevinandamanda.com
alternative text
Credits: Kit - "So Wonderful" by Snowflake Beach Designs; Photo - Morgan Taylor; Fonts - Pea Amy*Rica Script by kevinandamanda.com

Saturday, July 25, 2009

India and Mom's Lineage

Just jumping on briefly to post two of my recent layouts.

The first is from my sister's trip to India. She took a series of photographs at sunset on a beach that I just love. I scrapped one of the pictures in the following layout. The picture was taken March 11, 2007 in Alibaug, Maharashtra, India. I found this wonderful kit by Sweet Tomato Designs and had to use it!

alternative text
CREDITS: "Darjeeling" kit by Sweet Tomato Designs; Font: The King and Queen from Dafont.com
The next is a layout of my mother's lineage. Starting with me it goes back four generations to my great-great grandparents. One neat thing is that we actually have a tintype of my Great-Great-Great Grandfather, but there wasn't enough room on this layout to display it as well. My sister has done extensive research on this side of the family's ancestry. And as a companion to that, I have been scanning my grandmother and grandfather's photos for a couple of years now. I probably have about 800 scanned (mostly dating to the early 1950s and earlier), but have a lot more to go of more recent photographs. My grandmother died in late-April and since I had taken on this project I am holding all of her pictures right now until I can scan all of her photos and distribute them to the family on DVD. I would encourage anyone who can put together a layout of their lineage to do so. It is a good record to have for future generations. And I love photos, it brings the people in the family tree to life.

alternative text
CREDITS: "Antebellum Collection" by Raspberry Road Designs; Font: Pea Carol from kevinandamanda.com
We are having a party in a few weeks and I have so much work to do to get this house ready for it---including painting a room---so I will not have much time to post or for scrapbooking altogether.

Saturday, July 18, 2009

Applying Drop Shadows to Many Layers

So you have a layout with a lot of layers that need the same drop shadow applied as in my layout below. Do you really want to adjust each one by one? No! There is a faster way.
Camp Food Layout

Today I am going to show you a quick way to apply a drop shadow layer style to as many layers as you would like.
First, apply a drop shadow to one layer as you normally would do.
1. Select the layer that you want to apply the drop shadow (DS) to.
2. Under the effects panel, choose the layer style button, and select Drop Shadows.
3. Select the drop shadow of your choosing and click "Apply."
Apply Drop Shadow

To adjust the default drop shadow (DS), select the effects (fx) symbol on the right side of the layer in the layer panel.
alternative text

Now change the default settings by adjusting the Size, Distance, and Opacity.
You can play around with this to your liking. I personally like to have small, dark drop shadows. When they are fuzzy they appear to me that the items on the page are floating in the air, so that is why I choose a low number for distance.
Adjust settings

Click "Ok" when you are finished adjusting the drop shadow.

Next we will apply this setting (drop shadow layer style) to as many other layers as you would like. First we must copy the layer style and then paste it onto the other layers.

So, check to make sure that the layer is still selected in the Layers panel on the right.
verify layer is selected

Then go up to "Layer" in the menu along the top of the screen, select "Layer Style" and then "Copy Layer Style."
layer--layer styles--copy layer styles

Then in the Layers panel, select all of the layers that you would like to apply the same drop shadow to. In my example, it is the other eleven squares in the grid.
select layers to apply DS to

Now, go back up to the "Layer" in the top menu, select "Layer Style," and this time choose "Paste Layer Style."
alternative text

And you are done---the shadow is applied to all of the layers you selected.
Shadow has been applied
CREDITS for layout: Page Kit "My Favorite Thing" by Jady Day Studio from SYTYCD contest.

Thursday, July 16, 2009

Template and Layout from Camping Trip

{free template below}
My husband and I went camping this past weekend. We had a really, really good time. The weather was perfect---and unbelievable for July. It hovered right around 80*F (26.7*C). So here's my first layout from the trip. I have more to come because, for one, I got some great pictures of the Papillons.
camp food layout
CREDITS: Page Kit "My Favorite Thing" by Jady Day Studio from SYTYCD contest. I altered the hotdog element to look like a sticker and rotated the striped paper. Fonts: Ravie. Pea Nicki by Kevinandamanda.com.
I also created a template for this layout and have made it available for you to download. Just click the image to download.
alternative text

The neat thing about this template is that I drew it out while we were camping, and then on Tuesday Cathy Zielske did a video as a guest blogger for Ali Edwards' blog in which she showed how to do multi-photo grids for layouts using PSE 7. What a coincidence! You can check out the video on her blog by clicking here.

Thursday, July 9, 2009

Creating Realistic-Looking Splatter in Photoshop Elements

Today I want to show you how to create realistic-looking splatter in PSE. I did this for a recent layout and when I printed it out it looked awesome. Here's a close-up of the section of my layout.

alternative text
Credits: Kit is Wild Child by Snowflake Beach Designs
I am working in PSE 7.

First, create a new layout or go to the layout you are working on where you have added splatter. Put the splatter partially going over the edge of a piece of paper or a photo. For now, keep the photo nice and square, don't tilt it any direction---just straight.


alternative text

Use the Zoom Tool to zoom in on the splatter. A quick way to get the Zoom Tool is to type the letter "Z."
alternative text

Next add the grid over your photo. It will help in this process.
To do this select View from the top menu, and then Grid from the drop-down menu.
view grid

Next, select the Move Tool in the left column. A quick way to access the Move Tool is by typing the letter "V." Then while holding down the Ctrl key select both the photo layer and the splatter layer by clicking on each layer in the layer panel on the right side of the screen.
:Select

Now, slide your picture and splatter over so that the photo's edge lines up with one of the grid lines. The purpose of this is to give you a guide to follow.
Line Up with the Grid

Now go to the left side to the tools menu and select your Brush Tool (or select it by typing the letter "B"). From the style drop down along the top choose a soft round brush. Set it to size 5 or smaller. Choose "Shadows," and set the exposure to about 50%.
Select Brush

Next you want to make sure you are only working on the "splatter" layer, so select it in the layer panel on the right side of the screen.
Select Splatter Layer

Using the brush, trace along the edge of the photo following the grid line running the brush across the splatter.
Trace along edge of photo

Next, still using the brush tool, change the setting to range "Highlights." Then trace along the line again. You have to do this if the splatter is glitter since there are also bright speckles in the splatter.
Change brush to highlight, trace again

Now you are almost finished. You are finished with the brush tool and can zoom back out. A quick way to zoom out is to hold down the Ctrl key and press 0.
zoom out

Grab the Move Tool (letter "V") again. Then select the two layers (photo and splatter) in the layers panel.
Select both layers

Now move the cursor over to the bounding box that outlines both the photo and splatter and move it around near the corner until a rounded double-headed arrow appears. Use this to rotate the photo and splatter the way you would like it to sit on the page.
Rotate photo and splatter

You are finished!
Credits: Splatter by Sarah Bennett from "Feels Like Home" and photo by Elise Cole

erin

Monday, July 6, 2009

My ABC Album

I am participating in the ABC Challenge at Gotta Pixel. Every week they provide templates for two letters.

I have not been posting what I have done every week, but thought I have done enough now to post what I have so far. I am using the kit "Take My Breath Away Collection" by Sweet Digi Designs that I bought with a coupon that I won at Gotta Pixel.

cover
A is for Alice
B is for Birdcage Vintage
C is for Cole
D is for Dad
E is for Elise


alternative text