Tuesday, June 2, 2009

Creating a Stroke in Photoshop Elements

alternative text

Again, my focus is to help new digi-scrappers, focusing on those also new to Photoshop Elements (and in particular, version 7.0, which is probably what you'll be using if you just bought it).

Scrapper's Guide seems to be filled with really good tips and tricks. So, once again I bring you a tutorial from them. It's on how to create a stroke. They provide directions for Photoshop Elements and Adobe Photoshop. Please visit these links to do the above.

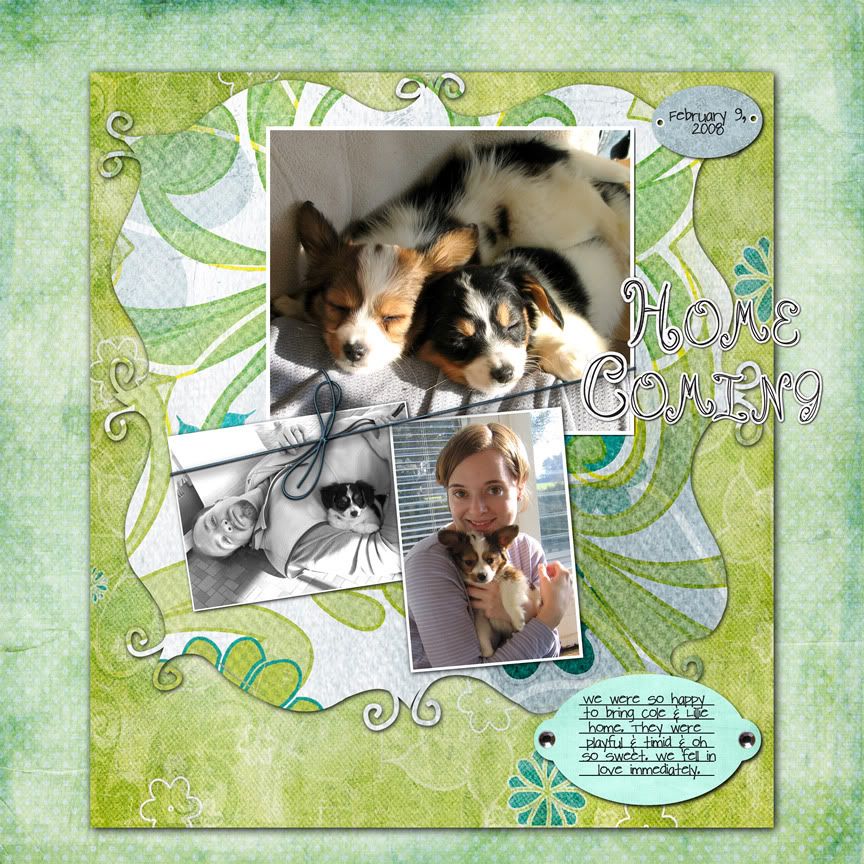
Also note that if you want to put a stroke around a picture, this is the tool that you use.

Here's a quick tutorial to put a stroke (or border) around a picture:

1) You have your photo open in Photoshop Elements and are ready to insert a stroke around the photograph.

alternative text

2) First, select the photo layer.

alternative text

3) Next, go to Edit in the top menu

alternative text

4) Then, select Stroke (Outline) Selection

alternative text

5) In the stroke window, make your selections. In the tutorial mentioned above (the Scrapper's Guide), they chose an "inside" stroke which creates crisp corners. Here I choose an outside stroke, which creates rounded corners. You will have to use trial and error to determine what width of stroke to use. Select "OK" when you are finished.

alternative text

6) The stroke is now wrapped around your picture.

alternative text

7) And you are all finished (I added a drop shadow).

alternative text


Monday, June 1, 2009

Trip to Arizona Layout

In mid-May I went to Arizona to visit one of my closest friends, Alice. We spent much of the time up at her Flagstaff house away from the heat of Phoenix (105*). We visited a few sites, ate brownies and lots of other wonderful treats, watched a few episodes of an interesting TV show, lazed around, and caught up. It had been a year and a half since I had moved away from Phoenix, and consequently since I had seen her. Believe it or not, we have kept in touch on at least a weekly basis, if not every other day, so it was as if we had not missed a beat.

Being back where I lived for ~17 months was strange. Everything was absolutely familiar, and yet felt like something I remembered from a dream. I had forgotten how exactly hot HOT can be, and was sweltering from the heat. I had also forgotten about how easy it is to get a sun burn. ;) It was easy to remember all of the things I thought were ugly about Phoenix, and yet given a new perspective I could look back and remember the charms of Arizona and Phoenix. I have to say when we set out to Arizona we went to experience an adventure, and I am happy to say it is a chapter of my life I will not forget. And I am just super lucky to have made a wonderful friend in that time.

Please enjoy my non-conventional digi-layout.

alternative text
CREDITS:
Kit - Green by Creashens & Joana Carvalho (catscraps.com)
Staple - Without End Partie 1 by cardamome (cadamomescrap.canalblog.com)
Alpha - Sweet Imagination by gypsy couture (thedigichick.com)
Photos - Alice Chen; Erin Fasano

Saturday, May 30, 2009

Speed Scrap

A "SS" or Speed Scrap is a ton of fun. Here is how it works. Everyone gets together on a forum online. The host gives a set of instructions, such as "pick out three related pictures," every 10 minutes up to 7 sets of instructions. Then you get the remaining 50 minutes to wrap up your scrap page and post it to the gallery and forum. This is a total of two hours to complete an entire layout. And amazingly, with the pressure of the competition (and usuallly some small reward), you get it done!

As stated in my last post, I participated in a speed scrap last night at goDigitalScrapbooking.com, but there are plenty of websites that host them on a regular basis.

I spent some time retouching my layout this morning, getting the shadows just right, etc., and am providing you a look at the speed scrap version and the retouched version below.

Home Coming
"Home Coming"
Credits:
- Papers from "Spontaneous Delight" by Carrie Stephens
- Mat shape from "My Secret Garden" by creations by Rachael at http://www.funkyplaygrounddesigns.com
- Tag from "Happiness" by Summer Driggs
- Journal from "Enjoy the Day" by Simply Sweet Designs by Kim
- Title Alpha from "Date Night" by Aaron Moris of Sir Scrapalot Designs
- Journal/Tag Alpha "Pea Charmaine" from KevinandAmanda.com

Friday, May 29, 2009

My First Speed Scrap!

I competed in a speed scrap over at goDigitalScrapbooking.com!!!!

I'm all excited after that intense, but fun, 2 hours. I'm so pleased with my results. Who knew I could scrap that fast? So that was my 5th or 6th layout ever. I'll give you a link and post it officially tomorrow with the proper credits.

And, if you don't know what a speed scrap is, I'll explain in my next post. Promise.

http://www.godigitalscrapbooking.com/photopost/showphoto.php?photo=57690

Tuesday, May 26, 2009

Rule Of Thirds

Cropping photos using the "Rule of Thirds" makes photographs seem more appealing, interesting, and exciting. It is a technique that can be used not only when taking photographs, but also back home when prepping photos for use in scrapbooking layouts.

There is a great tip on Scrappers Guide that describes how to simply apply a grid already available in Adobe Photoshop or Photoshop Elements to help you line up the objects in your photo to create an interesting dynamic by using the "Rule of thirds".

There are separate tutorials. One for Adobe Photoshop, available here: http://www.scrappersguide.com/tips_ps/thirds-ps/
and one for Photoshop Elements, available here: http://www.scrappersguide.com/tips_el/thirds/


****In other news, my wonderful husband bought me a 1TB external harddrive. How awesome is that?!!!****