
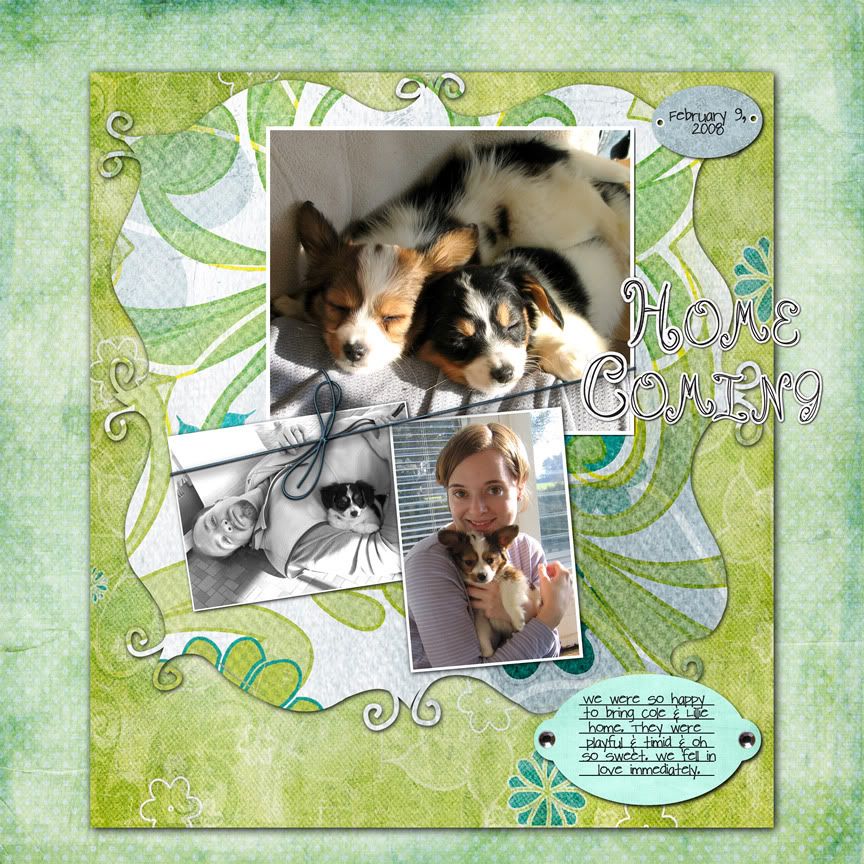
I created a new layout for a challenge I have entered at Scrap That Idea! The post about the challenge is here. For this challenge we were given an inspiration and had to come up with a layout.
Here is the inspiration:
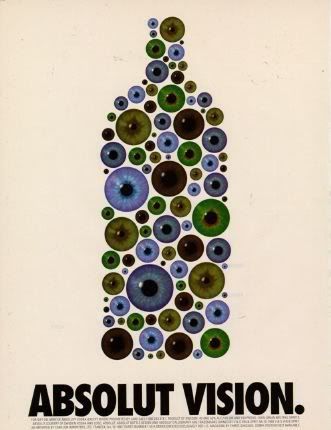
My translation of that is more literal than others. Mine is posted below, but you can visit the gallery and view everyone's layouts here.
Credits:
Papers for background and butterflies - "Simplicity" by A Work in Progress & "2 Little Bots" by Stacey's Scraps
Papers for background and butterflies - "Simplicity" by A Work in Progress & "2 Little Bots" by Stacey's Scraps
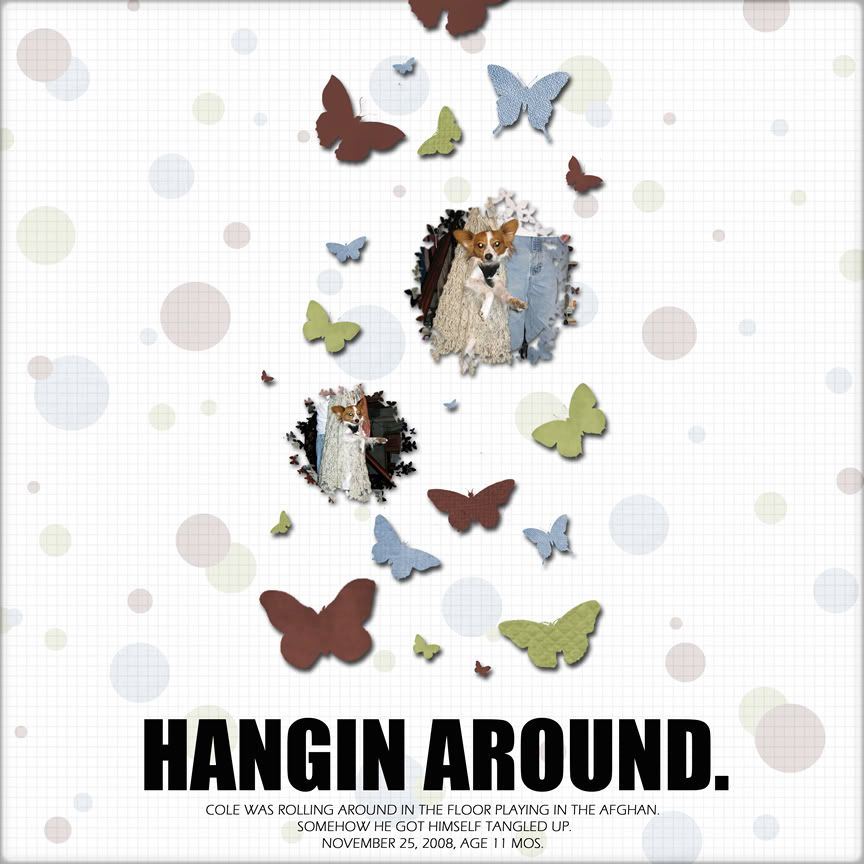
I can offer you three Photoshop Elements (PSE) tutorials based off of this layout. The first I will discuss in this post called "cut outs" or what I did to create the butterfly shapes from the paper. The other two are how to create your own mask, like I did here using butterflies as you see in the pictures of my dog above; and how to create your own shadows. I will post the latter two tutorials later.
Tutorial
How to Create Cut Outs and Make Papers/Pictures into Shapes:
Okay, are you ready? Let's go. (Note: I try to show you every single step so this is really basic.)
To do this tutorial, you will need a paper or picture that you want to cut in a shape, and the shape you are going for. I am using butterflies like in my layout.
Part 1: Create a Cut Out/Shape
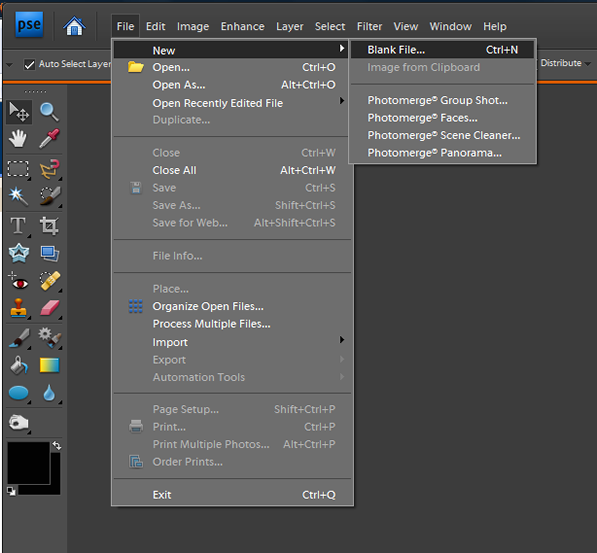
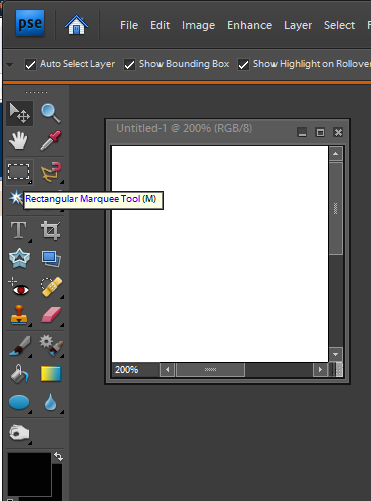
1.) Start by opening PSE and creating a new blank file. Make it big enough to hold your shape.
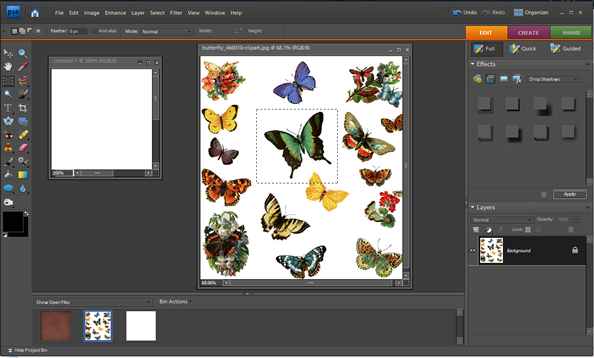
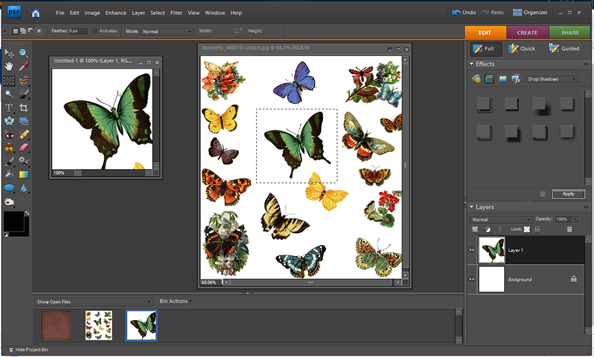
2.) Open the file that has the shape you want to use. My page is a bunch of butterflies.
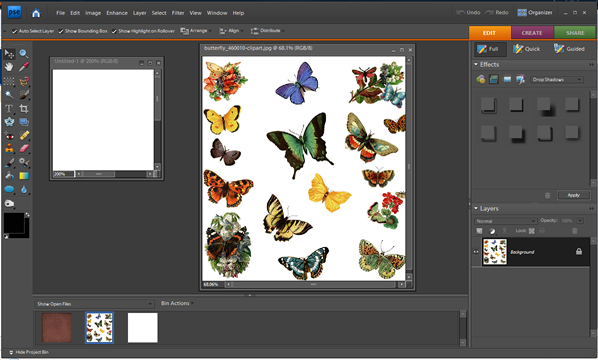
3.) Select the "Rectangular Marquee Tool".
4.) Draw a rectangle around the shape you want to use.
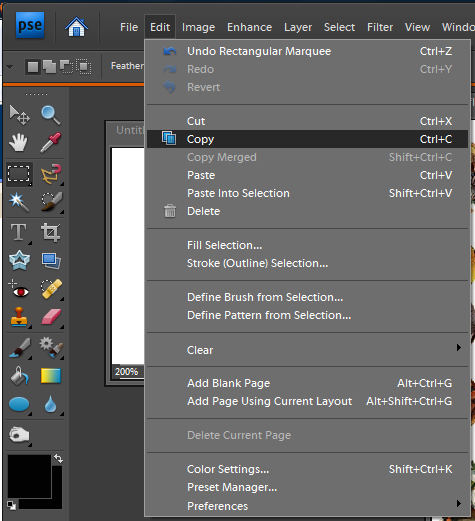
5.) Select Edit > Copy (or Ctrl+C) to copy the shape.
6.) Click on your "new" blank file, and then go to Edit > Paste (or Ctrl+V).
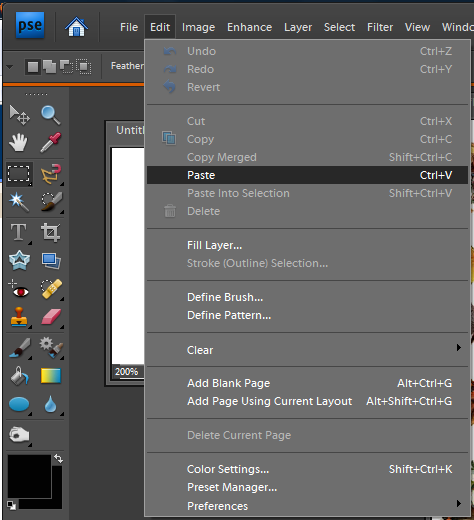
7.) Now you have the shape pasted into your new page.
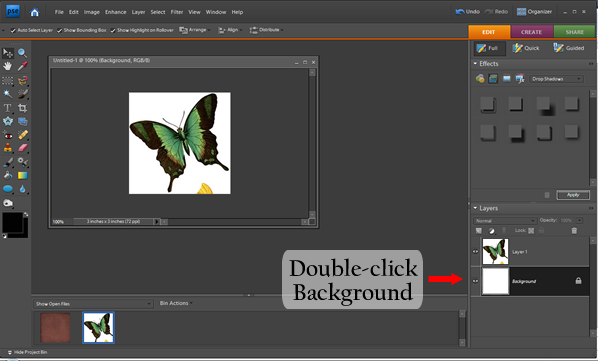
9.) Double-click on Background in the Layer Palette.
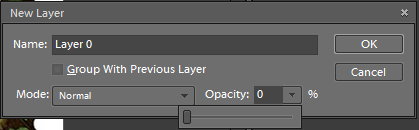
10.) Set the opacity of the background to 0%. This turns the background into a transparent layer.
11.) Select the shape layer.
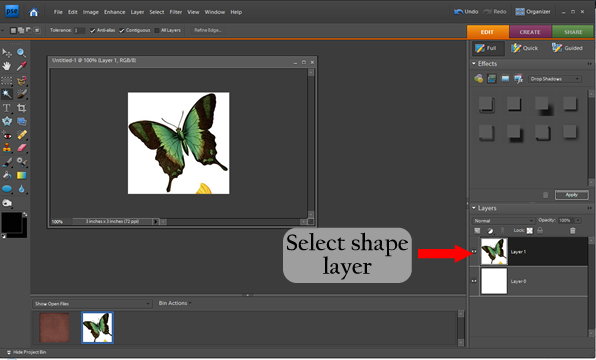
12.) Select the Magic Wand Tool.

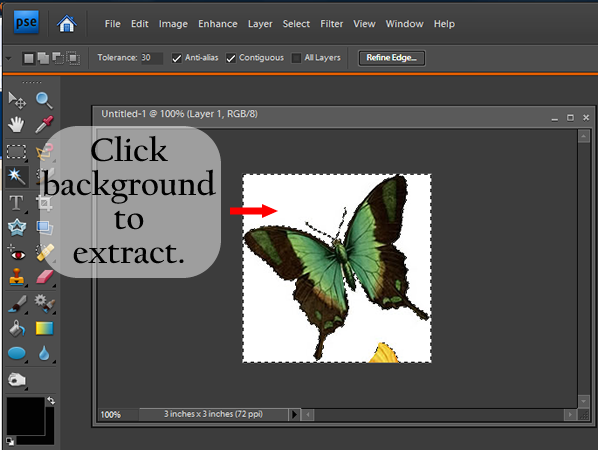
13.) Adjust the tolerance so that the Magic Wand Tool selects the entire background and none of the pixels of the shape you are trying to extract. Here I set the Tolerance to 30. Click on the the background (in this case the white area) to extract it.
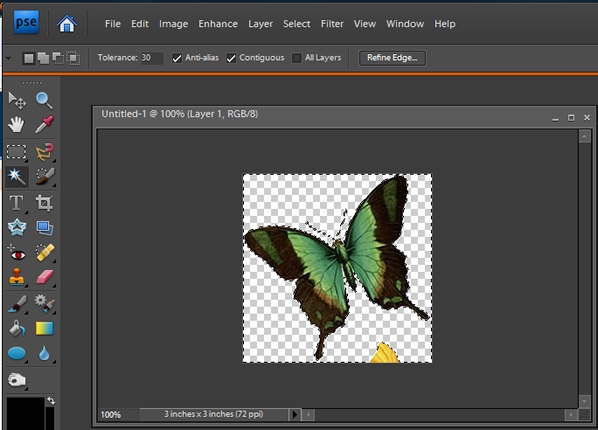
14.) Click delete to get rid of the background.
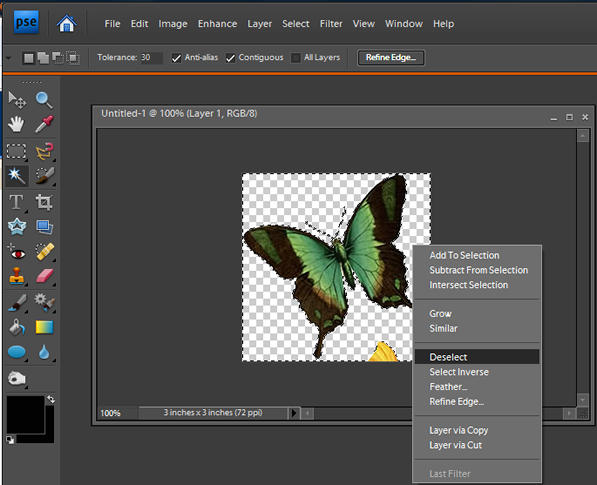
15.) Right-click and choose deselect (or Ctrl+D) to get rid of the marching ants.
16.) Next, select the Eraser Tool.
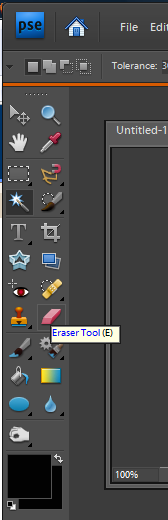
17.) Use the eraser tool to erase any areas that did not delete when you used the magic wand.
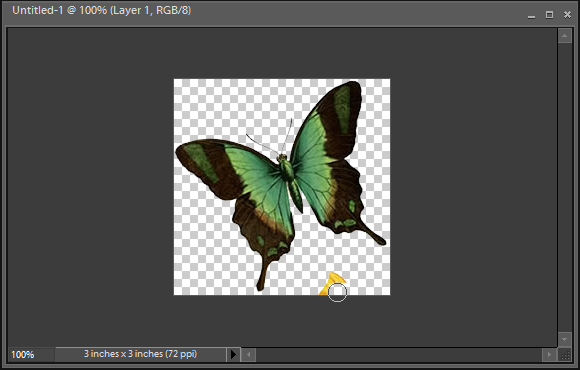
Now you have created what is called a "mask" in Photoshop. This mask is the shape that we use to cut our paper or photo.
Part 2: Make a Paper/Picture into a Shape
18.) Open the paper or picture that you are going to mask using the shape you just cut out.

19.) Select the Move Tool.
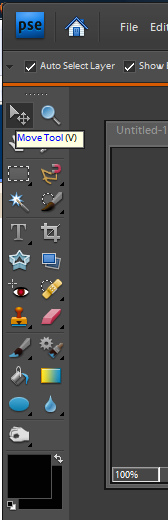
20.) Click on the shape. While still holding the mouse button down, drag the shape onto the paper or picture.

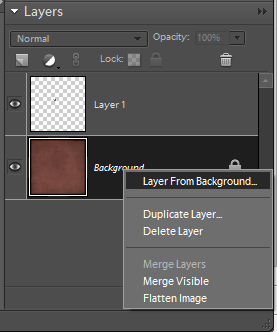
21.) In this scenario, the paper is the background. We want it to be a layer, so we will change that. To do that right-click on the background layer in the layer palette.
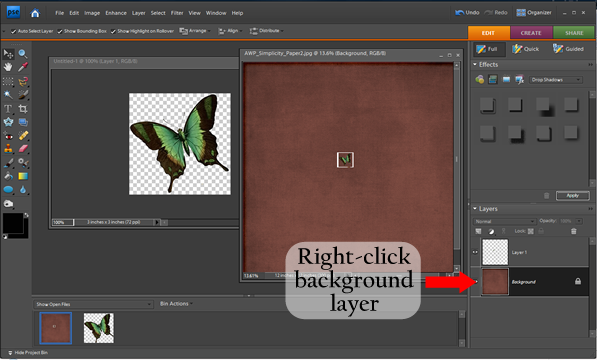
22.) In the menu that pops up, select "Layer From Background."
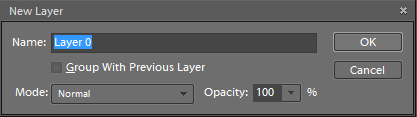
23.) In the box that opens, you can give this new "layer" (the paper layer) a name and click "Ok;" or bypass the naming and just click "Ok."
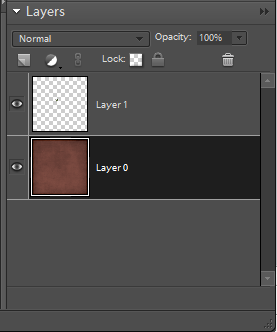
24.) Now you can see that the paper is its own layer.
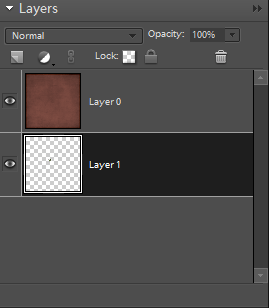
25.) Drag the shape layer below the paper layer.
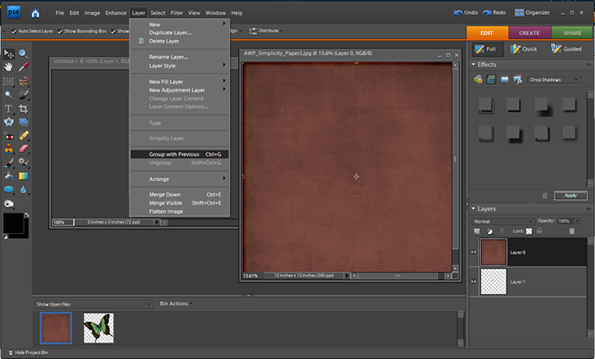
26.) Now, select the paper layer (the top layer). Then, go to Layer > Group With Previous (or Ctrl+G).
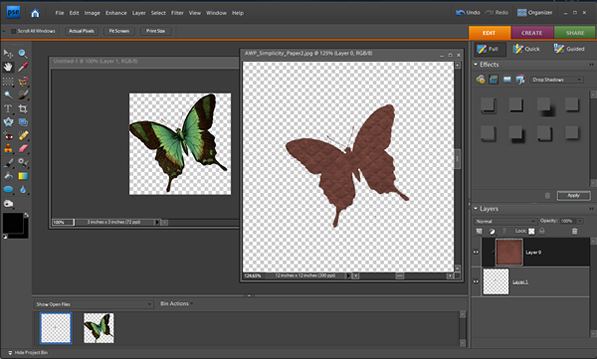
Below I have zoomed in on the results.
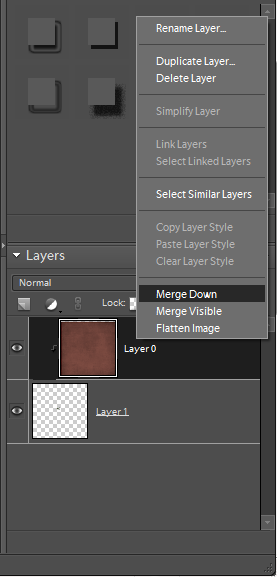
27.) Next, right click on the paper layer and choose "Merge Down."
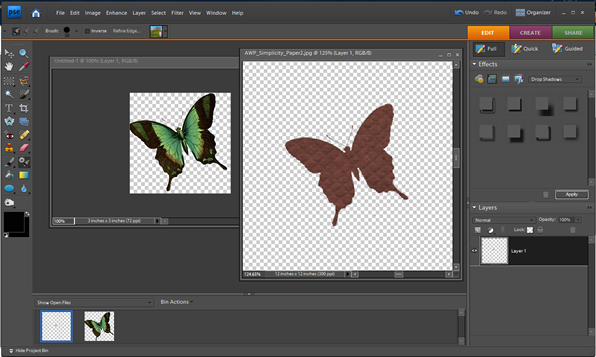
28.) You are finished. The paper or picture is now in the shape of your cut out (AKA mask).
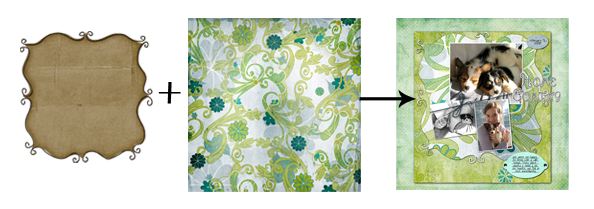
Credit: Brown paper from "Simplicity" by A Work in Progress
I used the same technique from Part 2 to create the mat behind the pictures in my last layout, "Home Coming."
Tutorial
How to Create Cut Outs and Make Papers/Pictures into Shapes:
Okay, are you ready? Let's go. (Note: I try to show you every single step so this is really basic.)
To do this tutorial, you will need a paper or picture that you want to cut in a shape, and the shape you are going for. I am using butterflies like in my layout.
Part 1: Create a Cut Out/Shape
1.) Start by opening PSE and creating a new blank file. Make it big enough to hold your shape.
5.) Select Edit > Copy (or Ctrl+C) to copy the shape.
6.) Click on your "new" blank file, and then go to Edit > Paste (or Ctrl+V).
7.) Now you have the shape pasted into your new page.
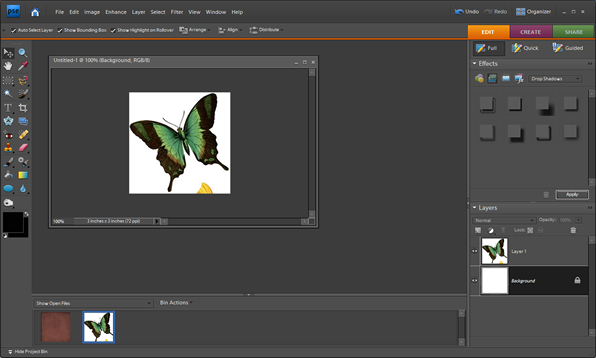
8.) Now you can close the shape page and simply view your "new" blank file that now has your shape on it.
9.) Double-click on Background in the Layer Palette.
10.) Set the opacity of the background to 0%. This turns the background into a transparent layer.
11.) Select the shape layer.
12.) Select the Magic Wand Tool.
13.) Adjust the tolerance so that the Magic Wand Tool selects the entire background and none of the pixels of the shape you are trying to extract. Here I set the Tolerance to 30. Click on the the background (in this case the white area) to extract it.
14.) Click delete to get rid of the background.
15.) Right-click and choose deselect (or Ctrl+D) to get rid of the marching ants.
16.) Next, select the Eraser Tool.
17.) Use the eraser tool to erase any areas that did not delete when you used the magic wand.
Part 2: Make a Paper/Picture into a Shape
18.) Open the paper or picture that you are going to mask using the shape you just cut out.
19.) Select the Move Tool.
20.) Click on the shape. While still holding the mouse button down, drag the shape onto the paper or picture.
21.) In this scenario, the paper is the background. We want it to be a layer, so we will change that. To do that right-click on the background layer in the layer palette.
22.) In the menu that pops up, select "Layer From Background."
23.) In the box that opens, you can give this new "layer" (the paper layer) a name and click "Ok;" or bypass the naming and just click "Ok."
24.) Now you can see that the paper is its own layer.
25.) Drag the shape layer below the paper layer.
26.) Now, select the paper layer (the top layer). Then, go to Layer > Group With Previous (or Ctrl+G).
Below I have zoomed in on the results.
27.) Next, right click on the paper layer and choose "Merge Down."
28.) You are finished. The paper or picture is now in the shape of your cut out (AKA mask).
I used the same technique from Part 2 to create the mat behind the pictures in my last layout, "Home Coming."
Credits:
- Mat from "My Secret Garden" by creations by Rachael at http://www.funkyplaygrounddesigns.com
- Floral Papers from "Spontaneous Delight" by Carrie Stephens (see post of layout above for credits)
- Mat from "My Secret Garden" by creations by Rachael at http://www.funkyplaygrounddesigns.com
- Floral Papers from "Spontaneous Delight" by Carrie Stephens (see post of layout above for credits)


No comments:
Post a Comment