Again, my focus is to help new digi-scrappers, focusing on those also new to Photoshop Elements (and in particular, version 7.0, which is probably what you'll be using if you just bought it).
Scrapper's Guide seems to be filled with really good tips and tricks. So, once again I bring you a tutorial from them. It's on how to create a stroke. They provide directions for Photoshop Elements and Adobe Photoshop. Please visit these links to do the above.
Also note that if you want to put a stroke around a picture, this is the tool that you use.
Here's a quick tutorial to put a stroke (or border) around a picture:
1) You have your photo open in Photoshop Elements and are ready to insert a stroke around the photograph.
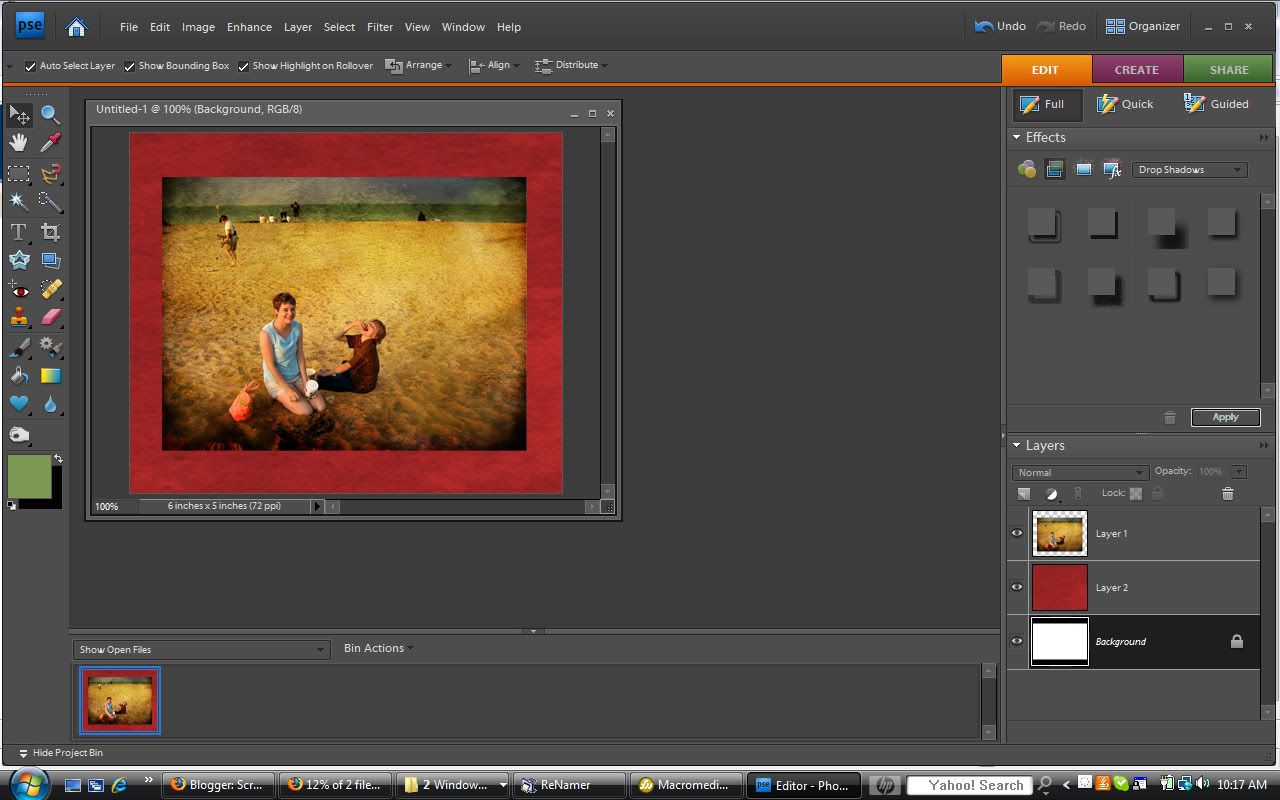

2) First, select the photo layer.
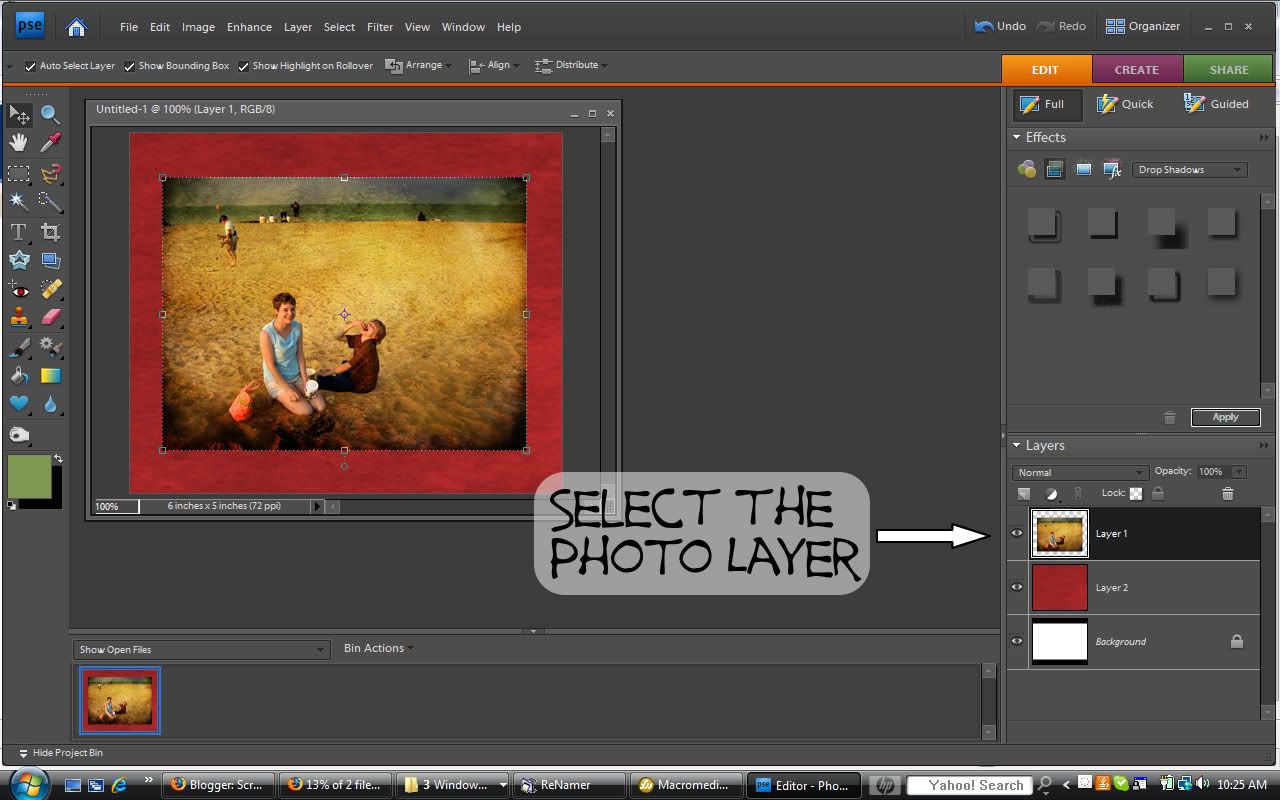
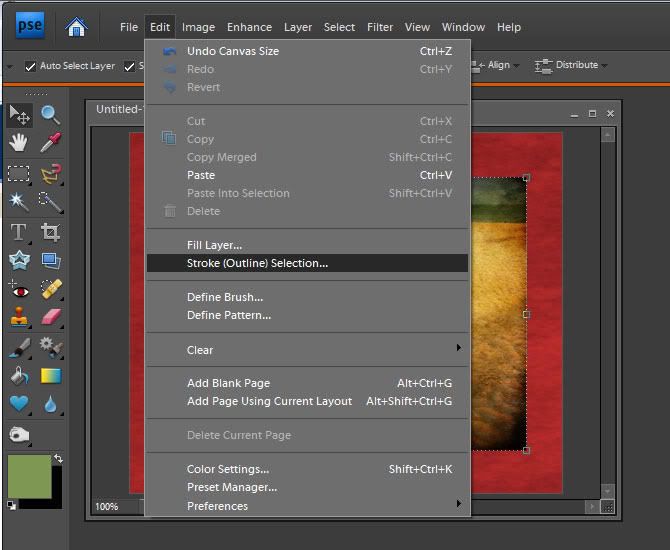
3) Next, go to Edit in the top menu
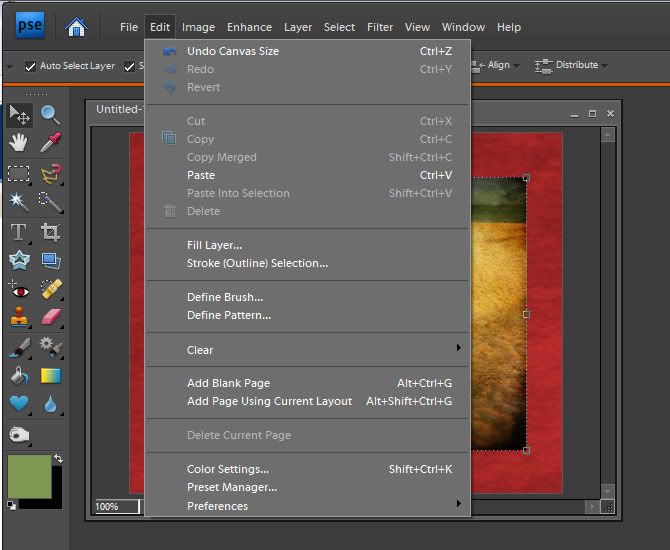
4) Then, select Stroke (Outline) Selection
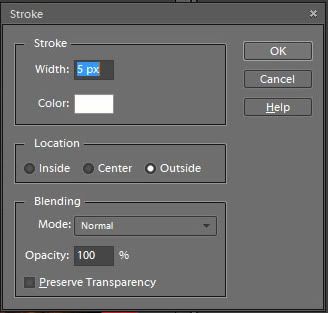
5) In the stroke window, make your selections. In the tutorial mentioned above (the Scrapper's Guide), they chose an "inside" stroke which creates crisp corners. Here I choose an outside stroke, which creates rounded corners. You will have to use trial and error to determine what width of stroke to use. Select "OK" when you are finished.
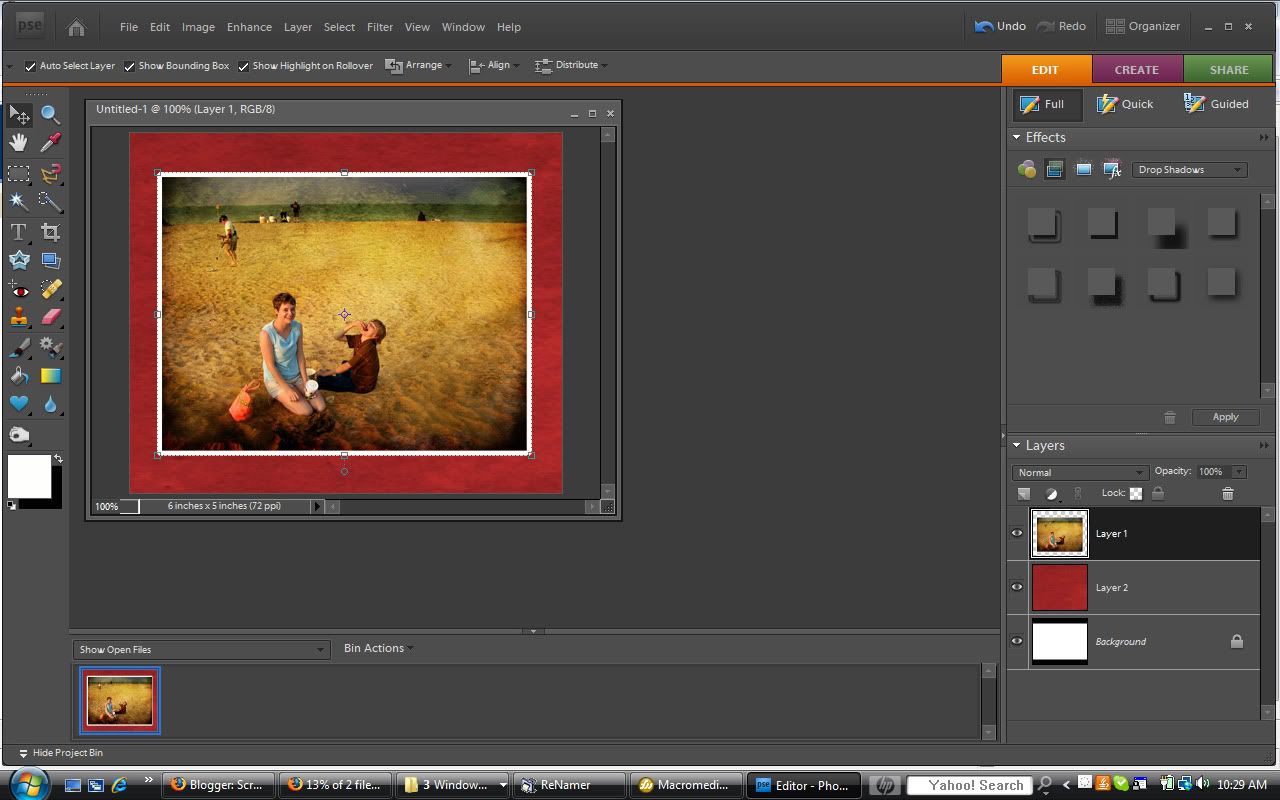
6) The stroke is now wrapped around your picture.
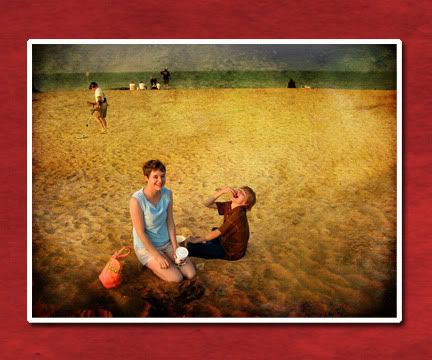
7) And you are all finished (I added a drop shadow).

3) Next, go to Edit in the top menu

4) Then, select Stroke (Outline) Selection

5) In the stroke window, make your selections. In the tutorial mentioned above (the Scrapper's Guide), they chose an "inside" stroke which creates crisp corners. Here I choose an outside stroke, which creates rounded corners. You will have to use trial and error to determine what width of stroke to use. Select "OK" when you are finished.

6) The stroke is now wrapped around your picture.

7) And you are all finished (I added a drop shadow).


No comments:
Post a Comment