
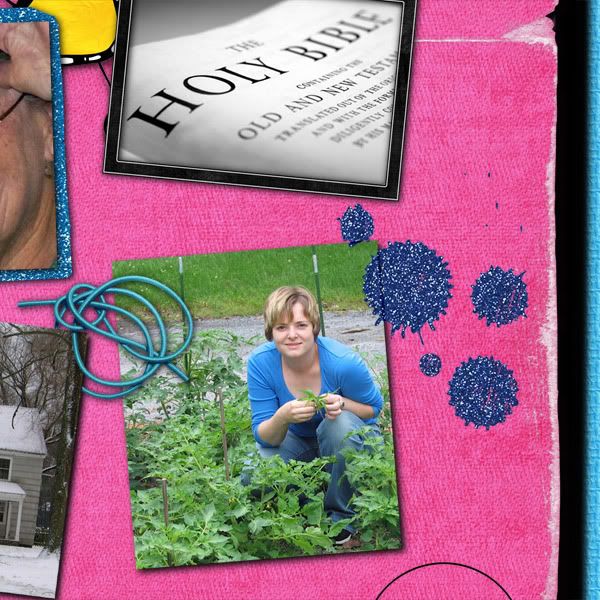
Credits: Kit is Wild Child by Snowflake Beach DesignsI am working in PSE 7.
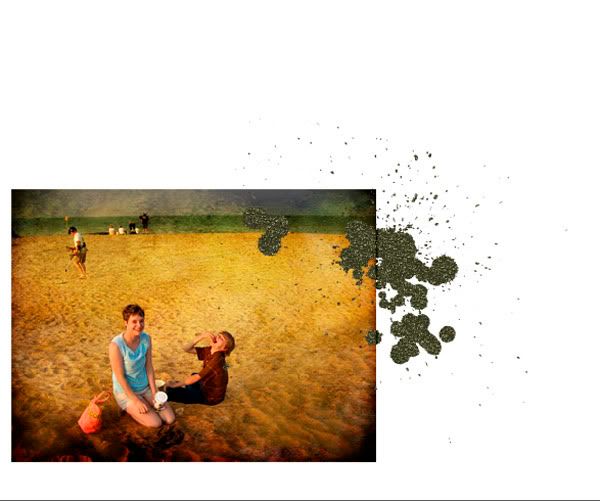
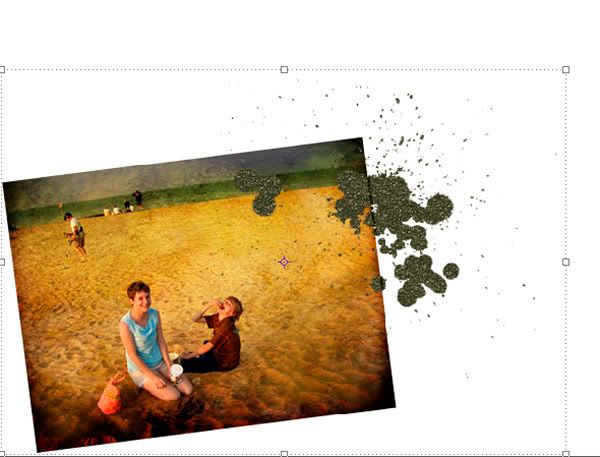
First, create a new layout or go to the layout you are working on where you have added splatter. Put the splatter partially going over the edge of a piece of paper or a photo. For now, keep the photo nice and square, don't tilt it any direction---just straight.
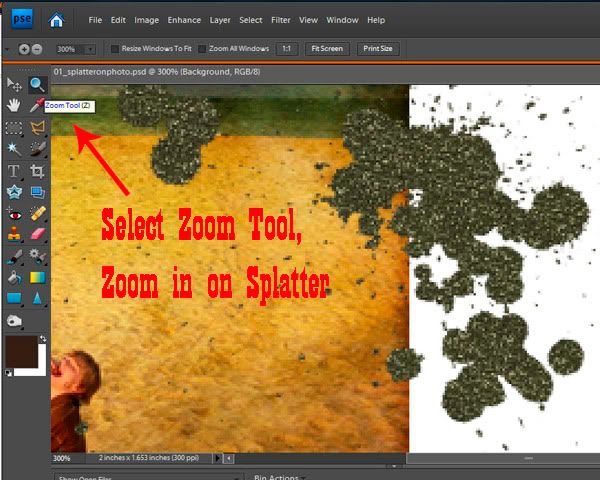
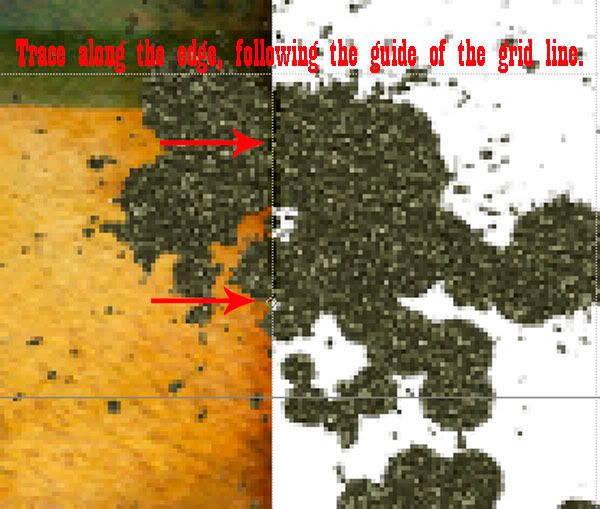
Use the Zoom Tool to zoom in on the splatter. A quick way to get the Zoom Tool is to type the letter "Z."
Next add the grid over your photo. It will help in this process.
To do this select View from the top menu, and then Grid from the drop-down menu.
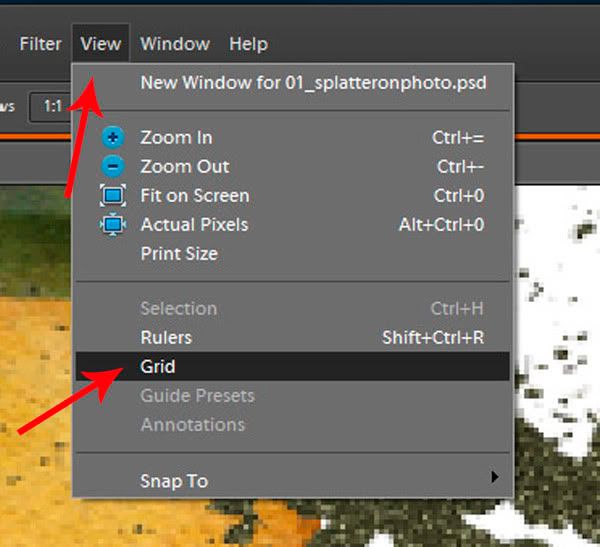
To do this select View from the top menu, and then Grid from the drop-down menu.
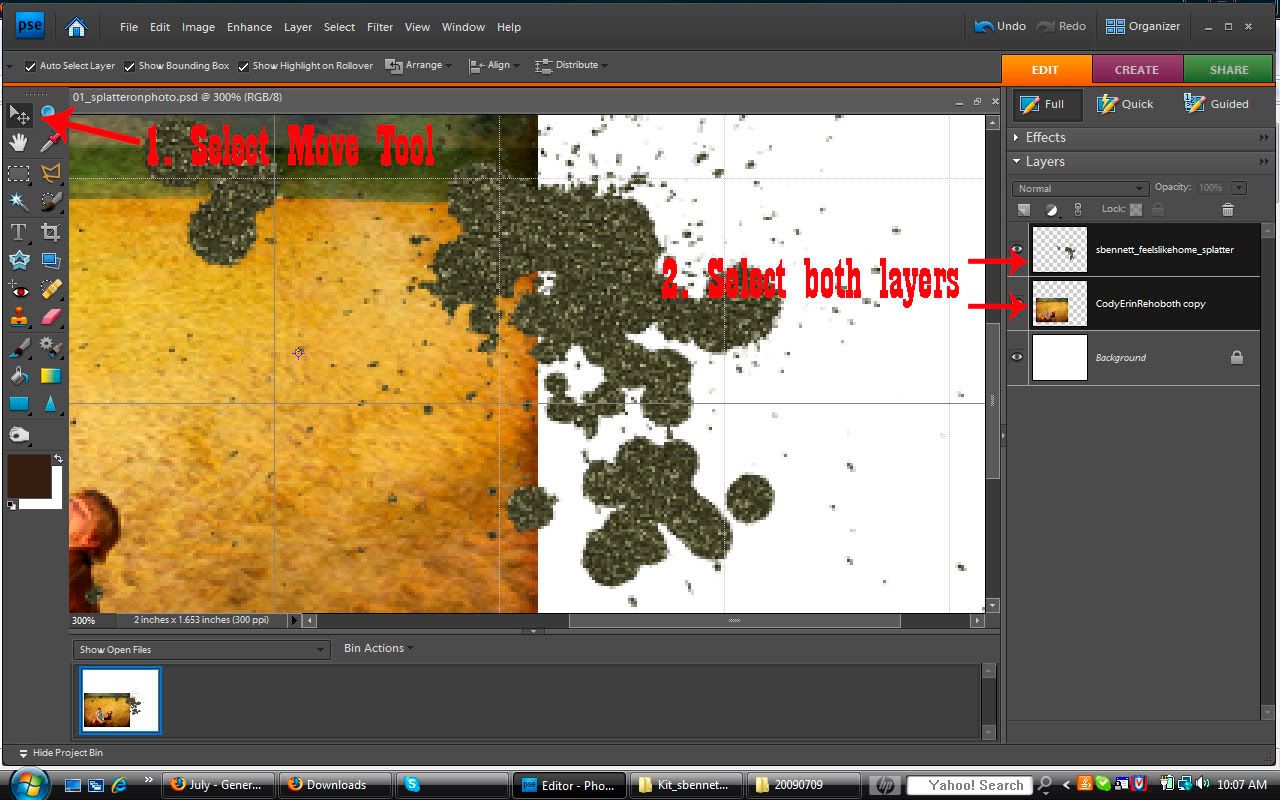
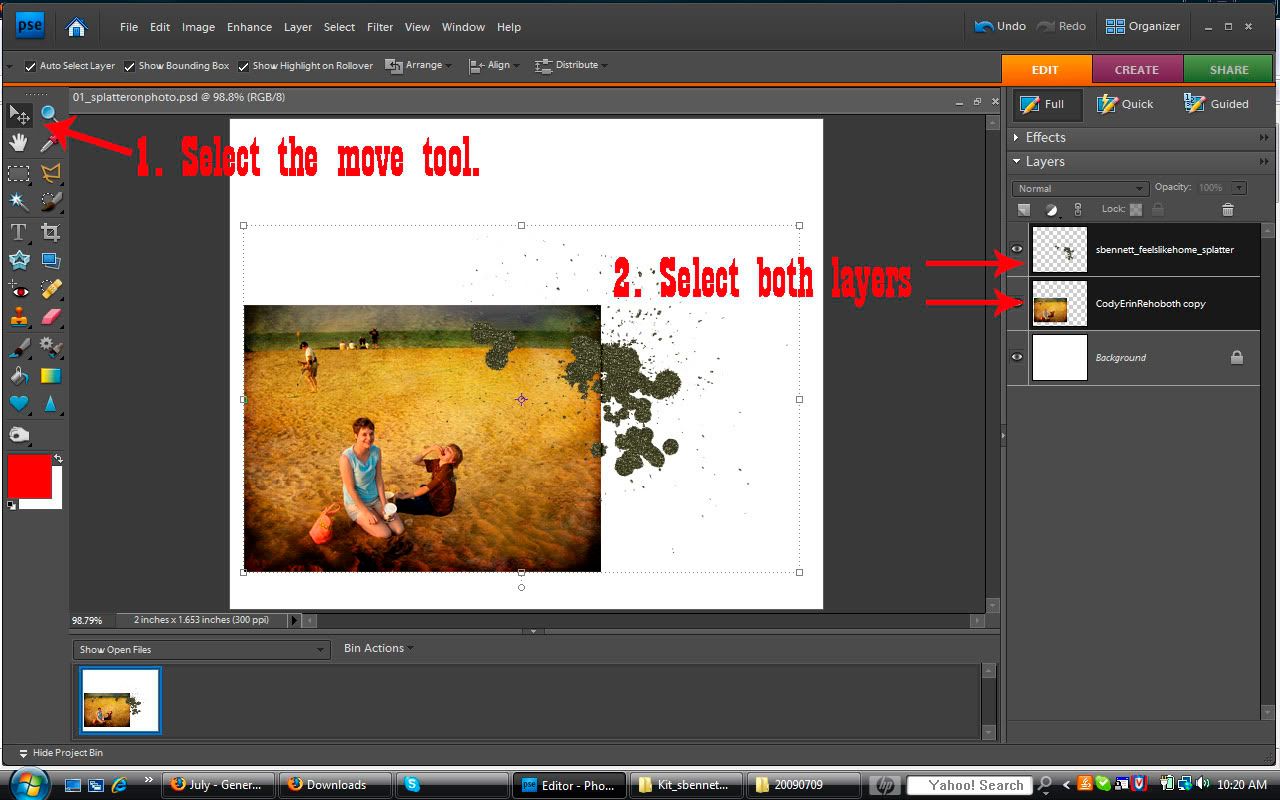
Next, select the Move Tool in the left column. A quick way to access the Move Tool is by typing the letter "V." Then while holding down the Ctrl key select both the photo layer and the splatter layer by clicking on each layer in the layer panel on the right side of the screen.
Now, slide your picture and splatter over so that the photo's edge lines up with one of the grid lines. The purpose of this is to give you a guide to follow.
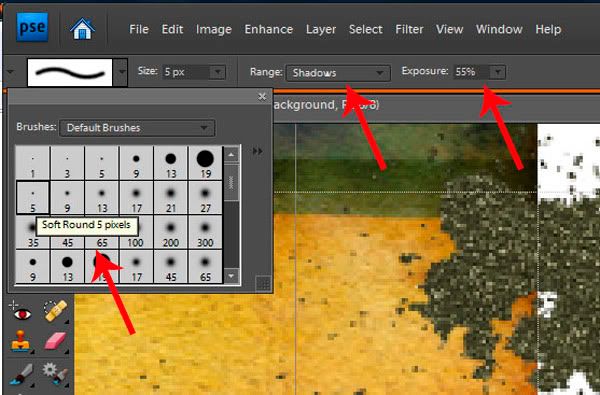
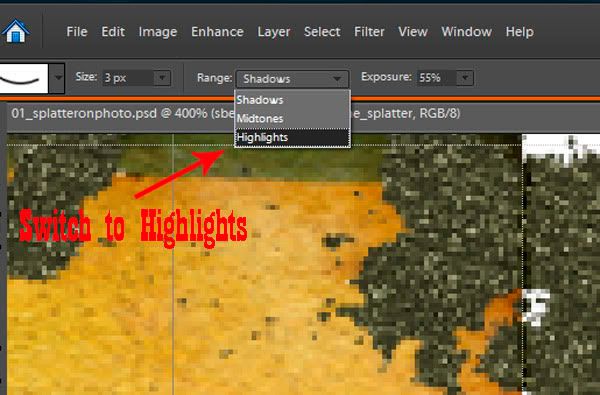
Now go to the left side to the tools menu and select your Brush Tool (or select it by typing the letter "B"). From the style drop down along the top choose a soft round brush. Set it to size 5 or smaller. Choose "Shadows," and set the exposure to about 50%.
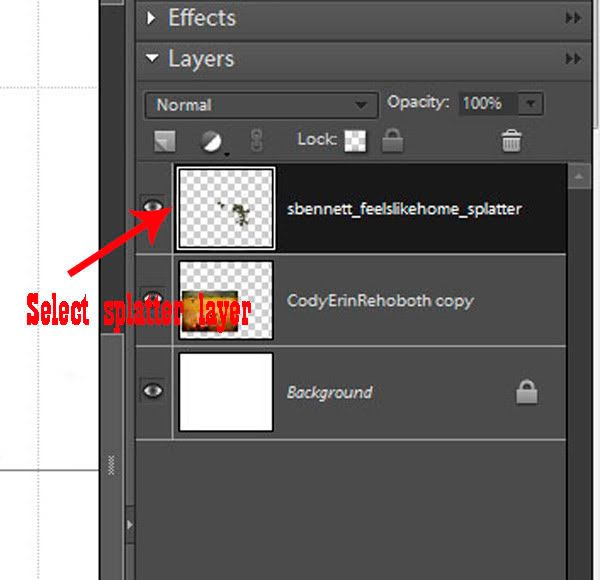
Next you want to make sure you are only working on the "splatter" layer, so select it in the layer panel on the right side of the screen.
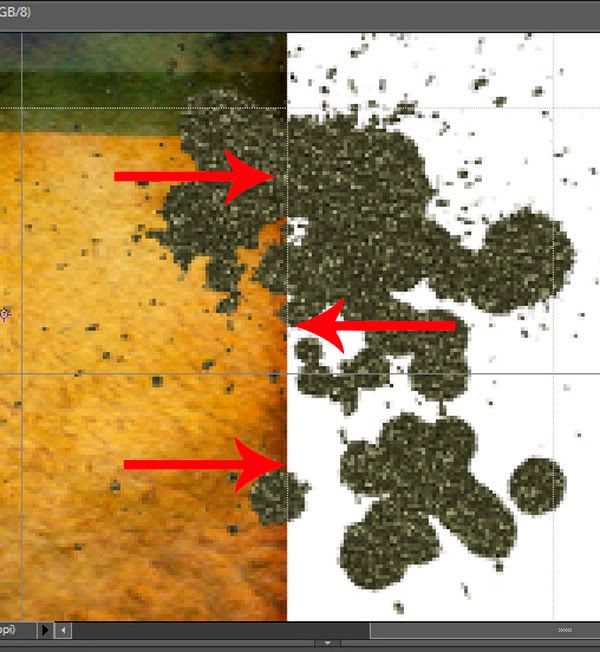
Using the brush, trace along the edge of the photo following the grid line running the brush across the splatter.
Next, still using the brush tool, change the setting to range "Highlights." Then trace along the line again. You have to do this if the splatter is glitter since there are also bright speckles in the splatter.
Now you are almost finished. You are finished with the brush tool and can zoom back out. A quick way to zoom out is to hold down the Ctrl key and press 0.
Grab the Move Tool (letter "V") again. Then select the two layers (photo and splatter) in the layers panel.
Now move the cursor over to the bounding box that outlines both the photo and splatter and move it around near the corner until a rounded double-headed arrow appears. Use this to rotate the photo and splatter the way you would like it to sit on the page.
You are finished!
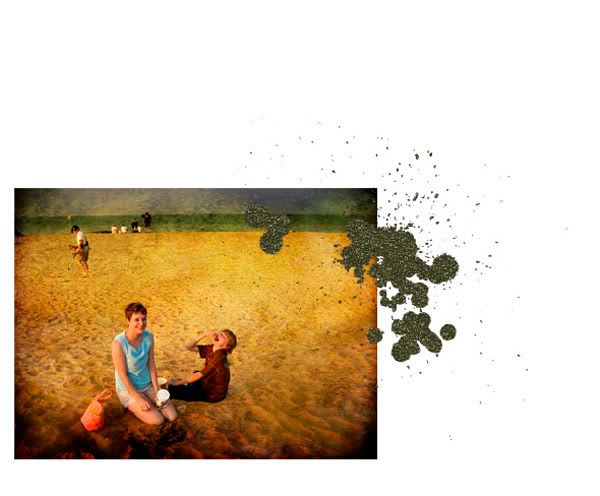
Credits: Splatter by Sarah Bennett from "Feels Like Home" and photo by Elise Cole


No comments:
Post a Comment