
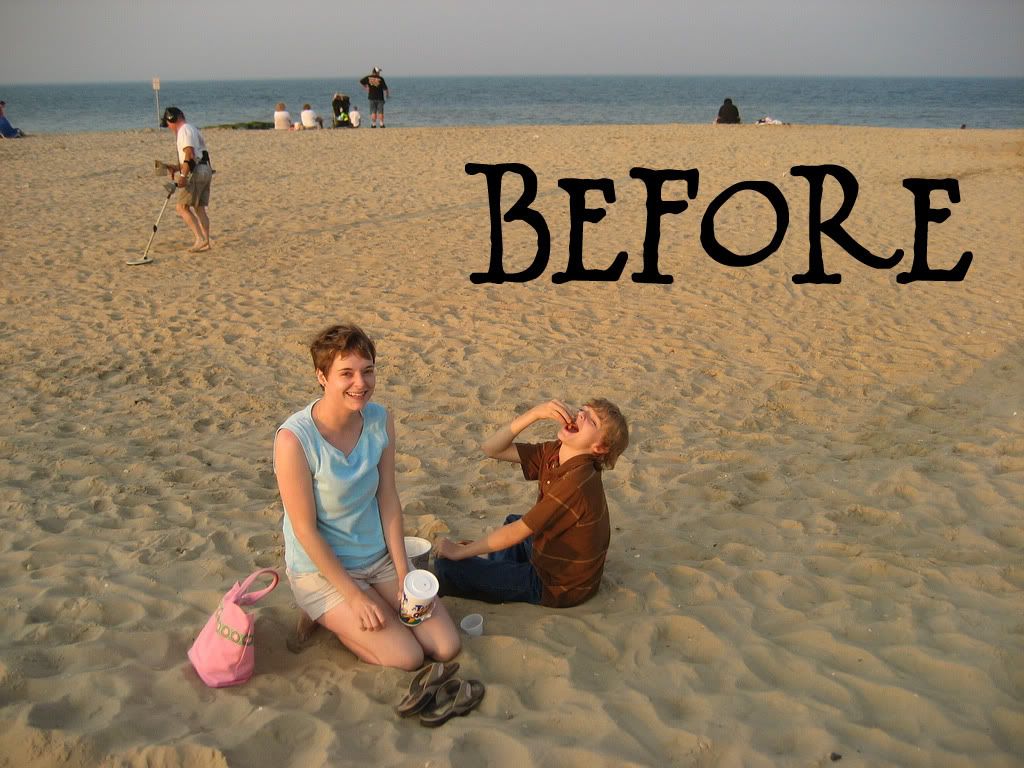
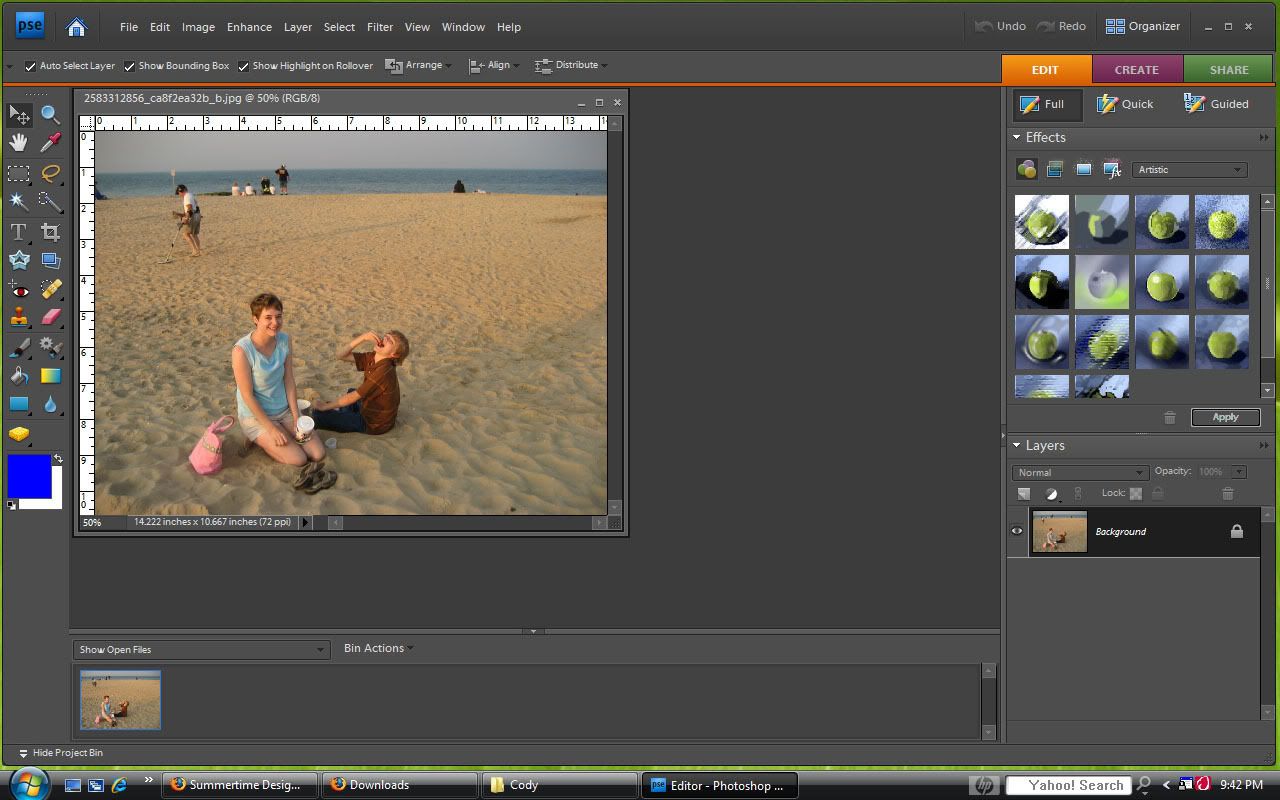
1. Start by opening your photo in Photoshop Elements.
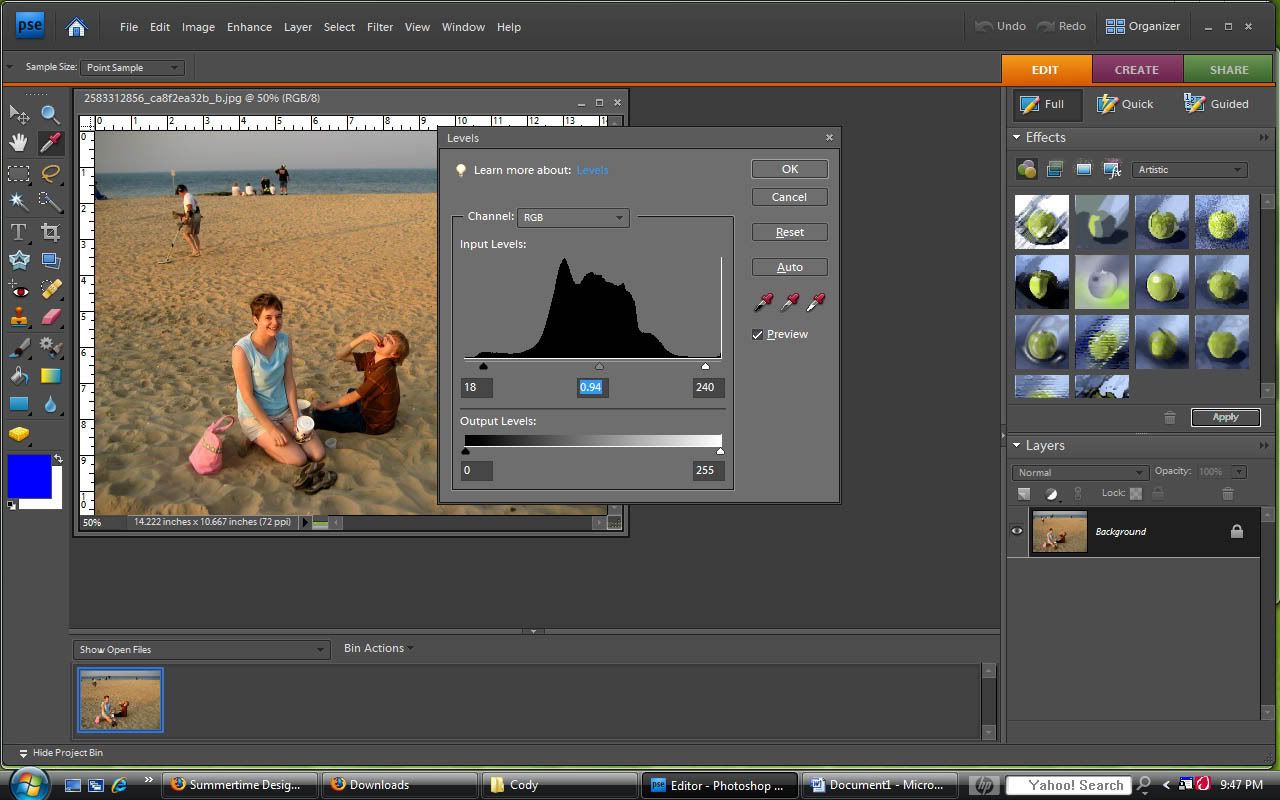
2. Since I'm following Summer's tutorial, the next step she likes to do is adjust the levels. You can skip steps 2 and 3 if you would like. To do this make sure your picture is highlighted in the layers section to the right. Then click "Enhance" > "Adjust Lighting" > "Levels".
2. Since I'm following Summer's tutorial, the next step she likes to do is adjust the levels. You can skip steps 2 and 3 if you would like. To do this make sure your picture is highlighted in the layers section to the right. Then click "Enhance" > "Adjust Lighting" > "Levels".
3. Move the tabs around to adjust the levels until you are pleased with your results. In Summer's tutorial she shows you exactly what she does. I will simply describe it. First, move the white tab on the right and move it slightly to the left. Next, move the black tab, on the left, over slightly to the right. Then move the middle gray tab to the left or right as needed. When you are done you can uncheck the "Preview" button to see the before picture to compare the changes.
4. To create a grungy look, you will need to find a texture to use to create an overlay. There are many textures available on the Internet. People also like to photograph textures themselves. For this tutorial I am using a texture that I found at http://www.deviantart.com. It is called "Forgotten Texture" by Firesign24_7 from this link: http://firesign24-7.deviantart.com/art/Forgotten-texture-117652416.
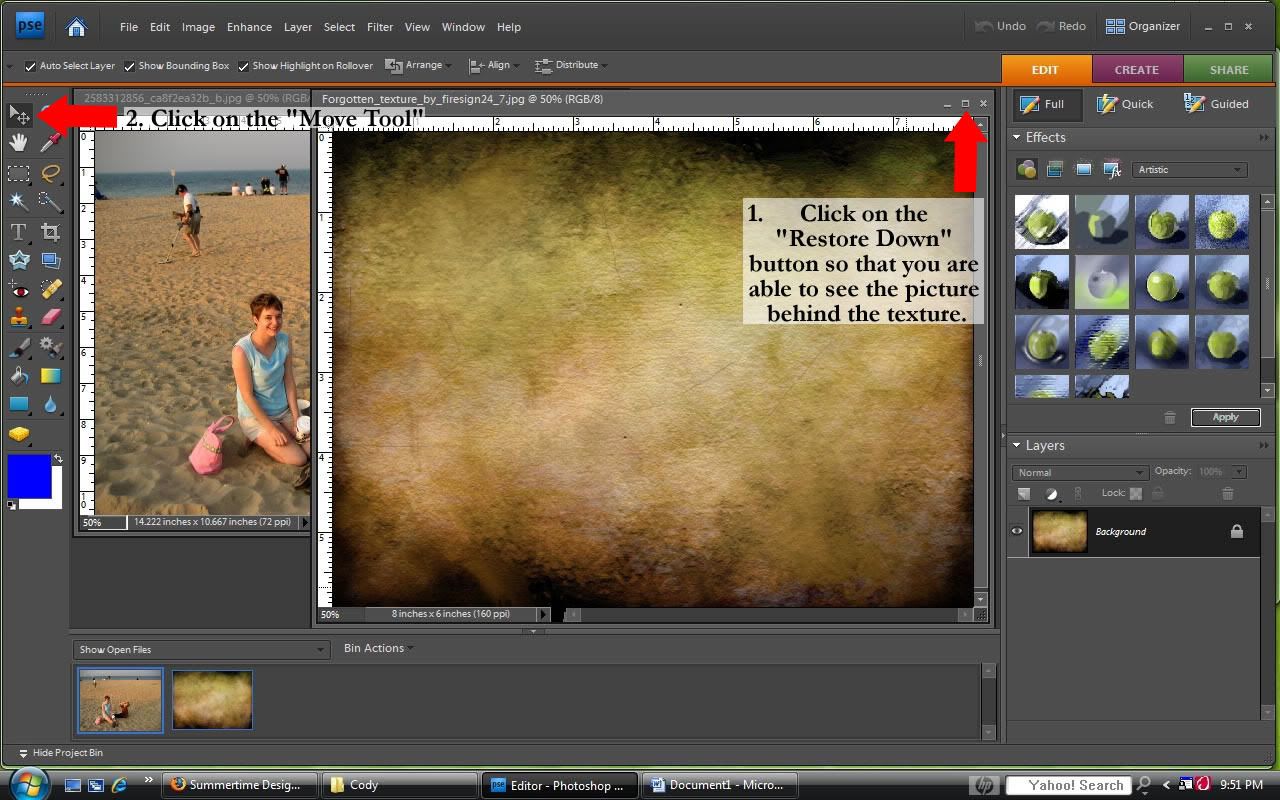
5. You should be viewing your picture on Photoshop Elements at this point. Next open the texture in Photoshop Elements. You need to be able to see both your picture and your texture at the same time. So if they are not both visible, click on the "Restore Down" in the upper-righthand corner of the viewing box, which is located to the left of the "X", it will have two small squares---one on top of the other. For the next step you need to click on the "Move Tool" on the top left of the toolbar.
4. To create a grungy look, you will need to find a texture to use to create an overlay. There are many textures available on the Internet. People also like to photograph textures themselves. For this tutorial I am using a texture that I found at http://www.deviantart.com. It is called "Forgotten Texture" by Firesign24_7 from this link: http://firesign24-7.deviantart.com/art/Forgotten-texture-117652416.
5. You should be viewing your picture on Photoshop Elements at this point. Next open the texture in Photoshop Elements. You need to be able to see both your picture and your texture at the same time. So if they are not both visible, click on the "Restore Down" in the upper-righthand corner of the viewing box, which is located to the left of the "X", it will have two small squares---one on top of the other. For the next step you need to click on the "Move Tool" on the top left of the toolbar.
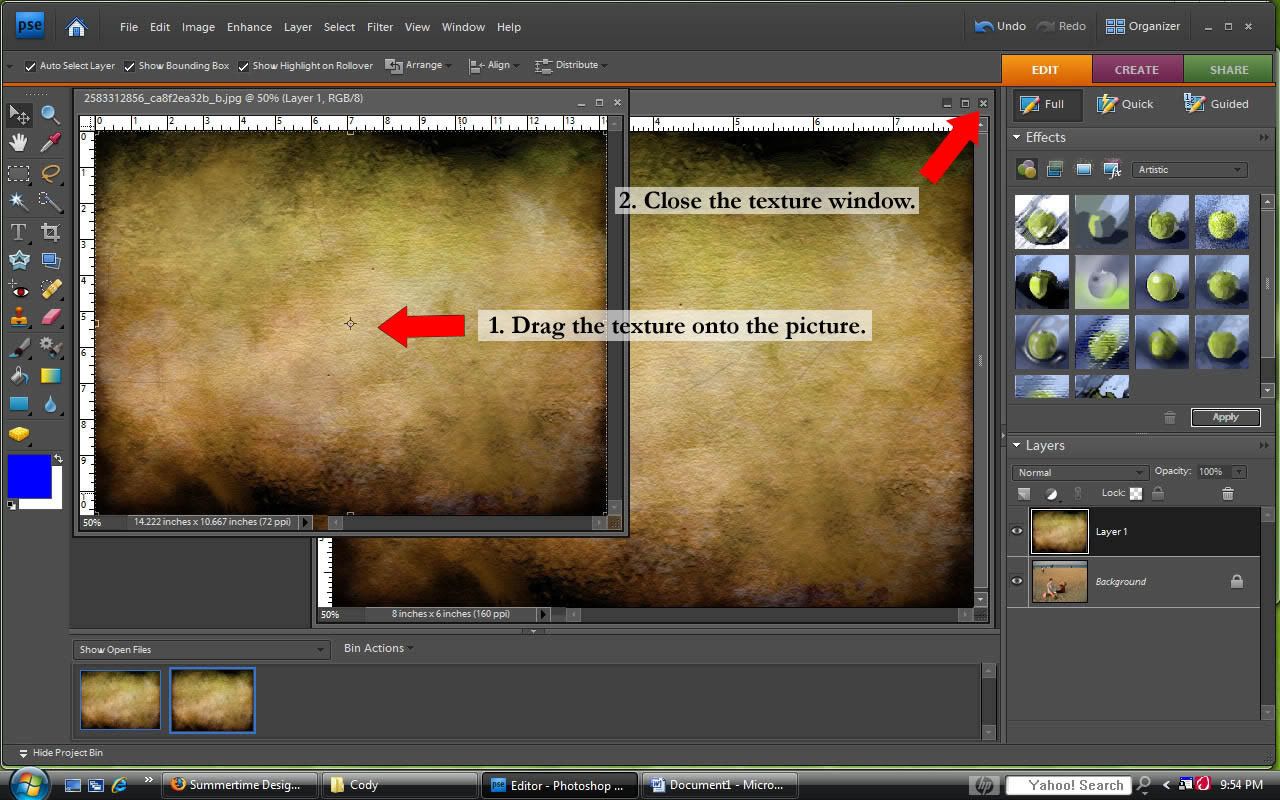
6. Next you want to drag the texture onto the picture. Now that you are viewing both the texture and the picture AND have selected the "Move Tool", it is real simple to move the texture onto the picture. Just grab the texture and drag it over onto the picture. In the texture window (in my example it is on the right), click the "X" in the upper right corner of the viewing window to close the texture window. You will no longer need it.
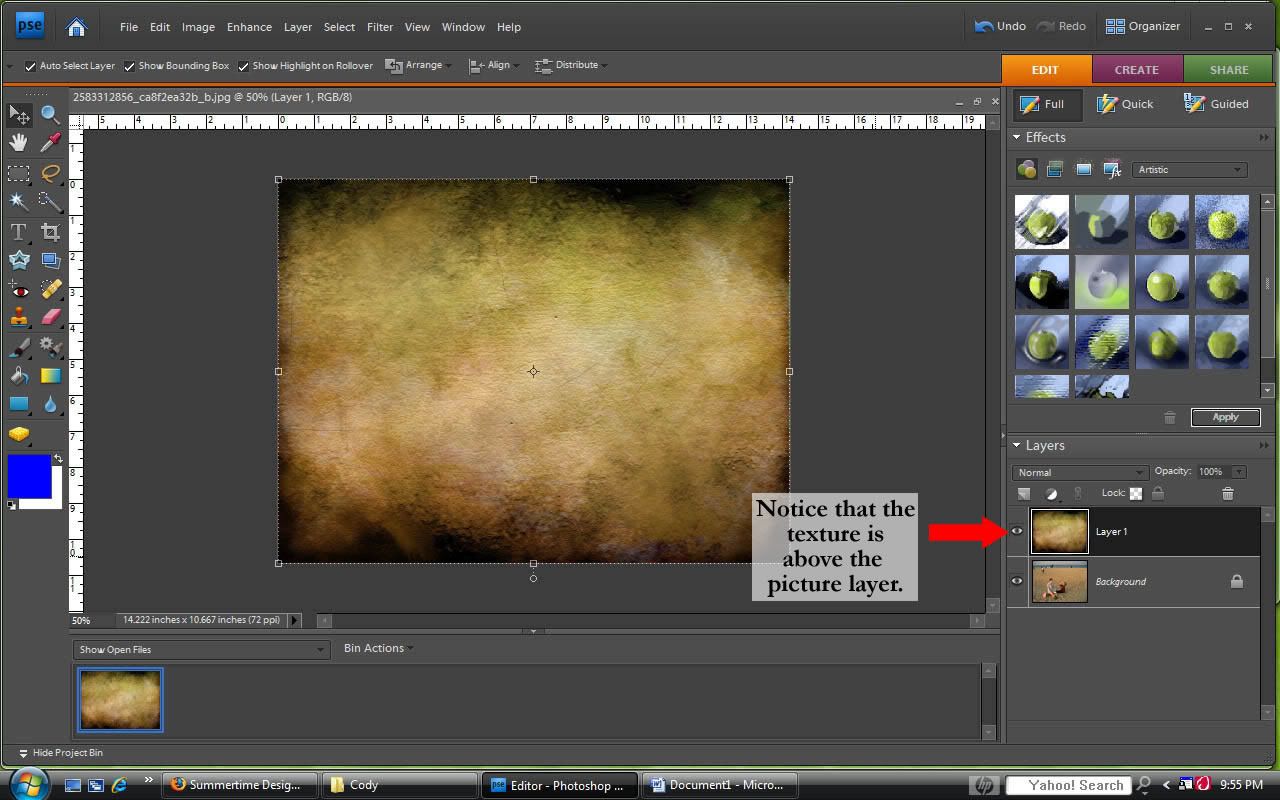
7. Once you do this, you will just be viewing the picture window, which has both your picture and texture on it. In the layers panel you will see that the texture layer is above the picture layer.
8. Next you want to make sure that the entire texture is covering the picture. Since both of these are photographs, my texture fit perfectly over the picture. To adjust your texture, make sure that the texture layer is selected by choosing it in the layers panel. Then using the bounding boxes at the sides and corners of the texture adjust the texture so that it is the same size as the picture. After making the adjustments, you will need to select the green check mark or hit the enter key to affirm your changes. Now the texture is covering the whole background.
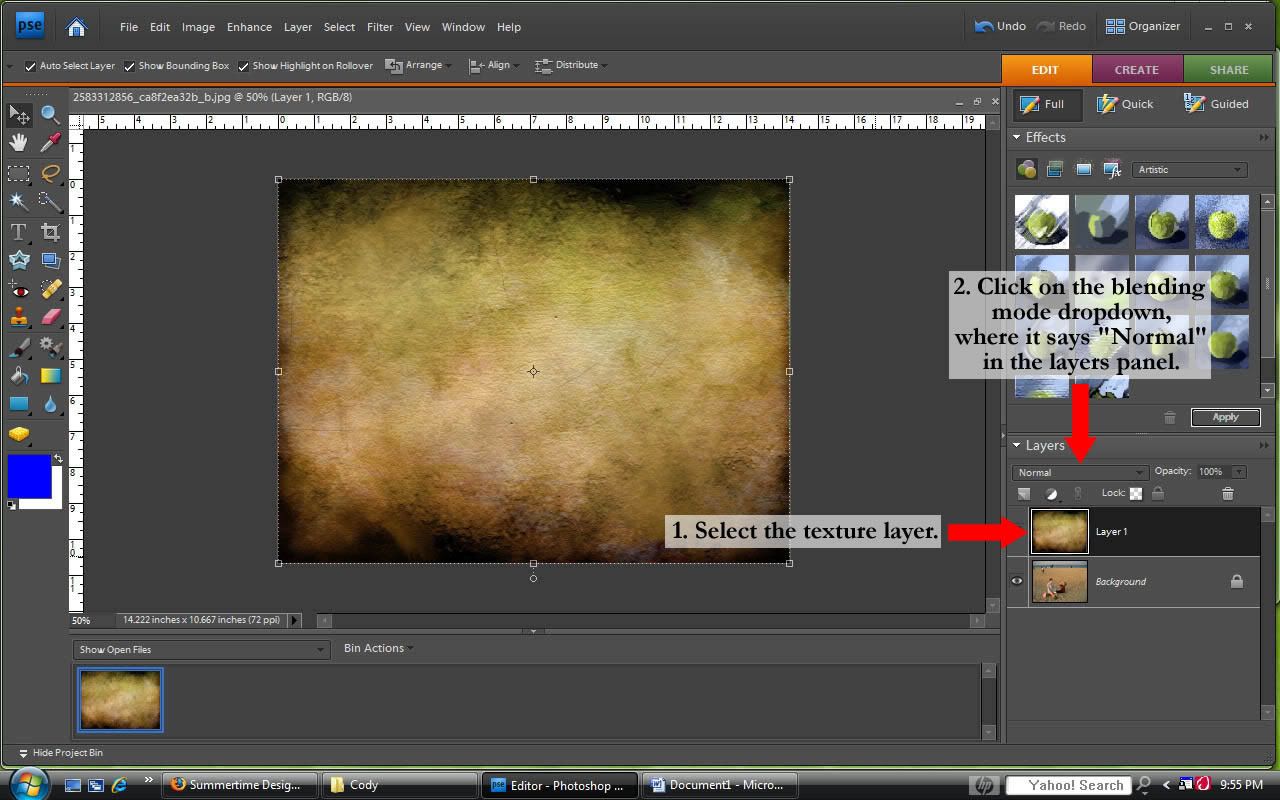
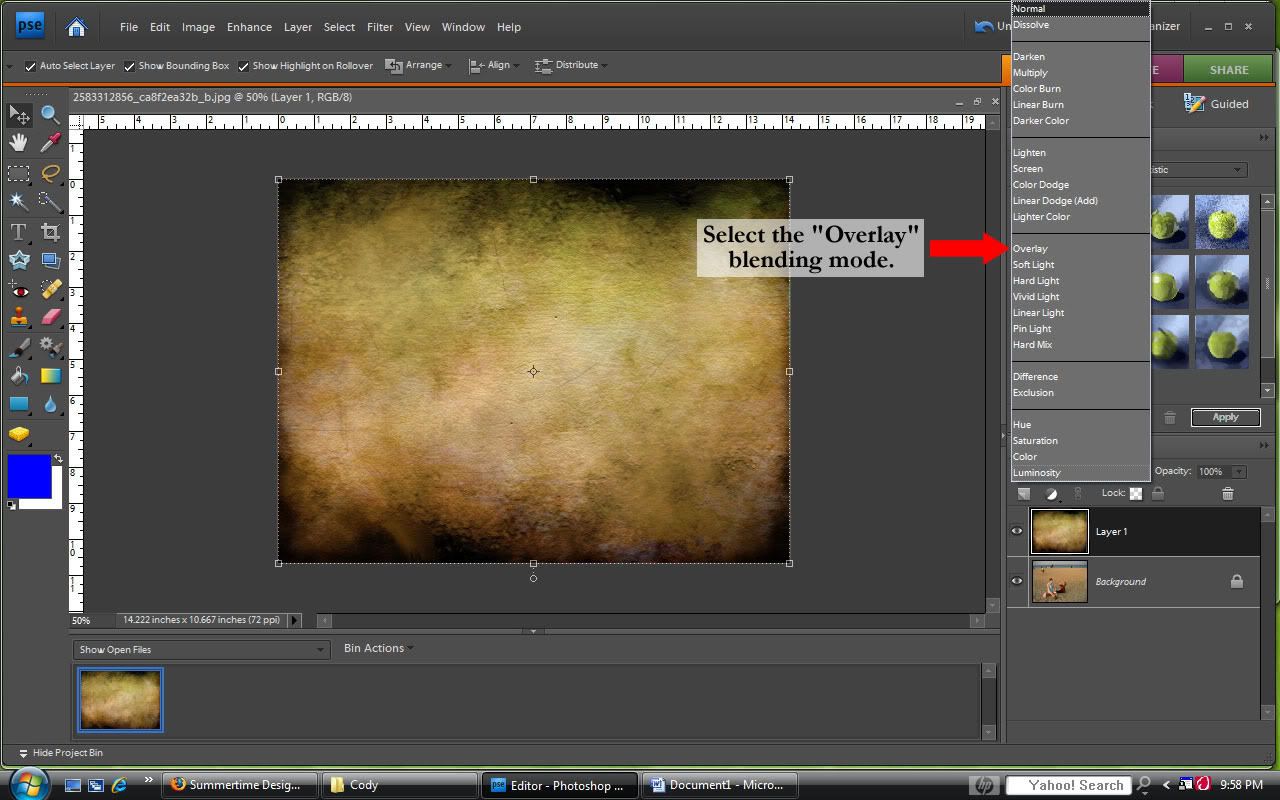
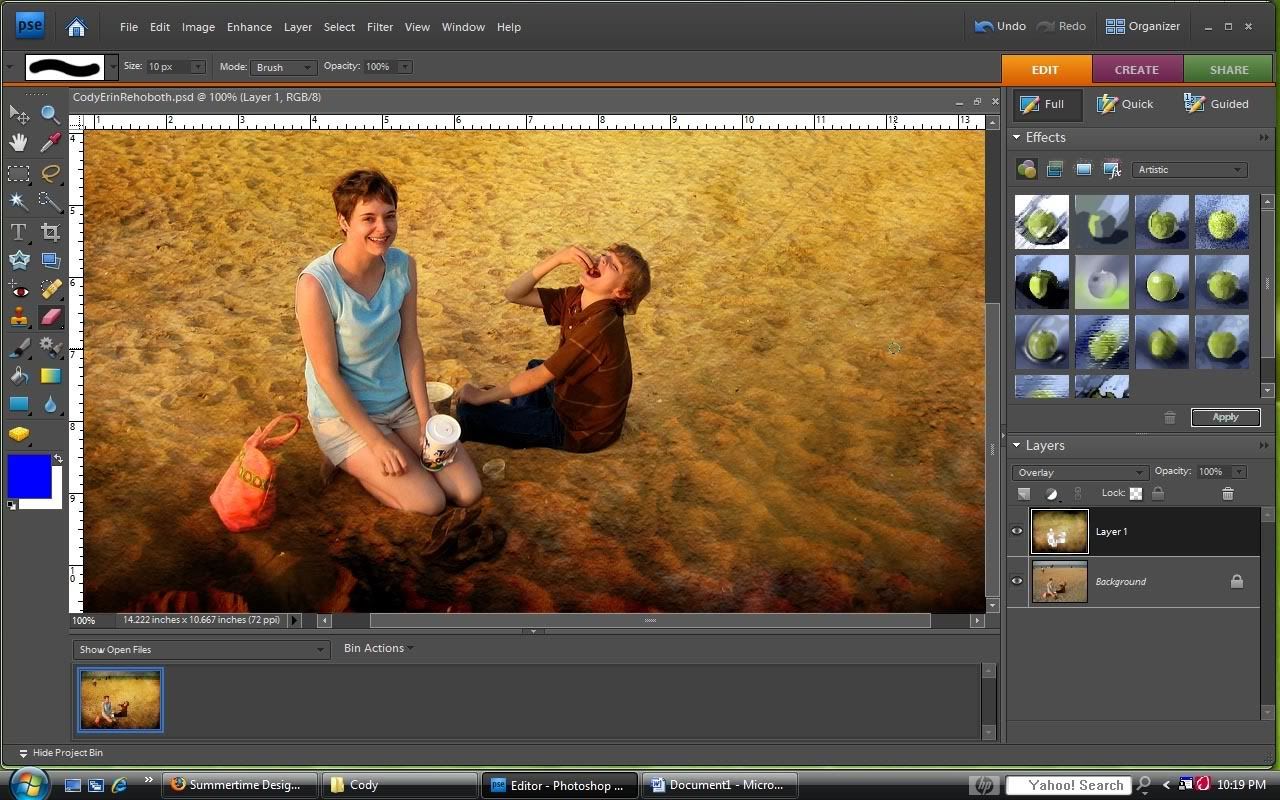
9. Now make sure the texture layer is selected by looking in the layer panel, and clicking on it if it is not selected. Then click the drop down blending mode, by clicking on the selection area that says "Normal" below the Layer Panel heading.
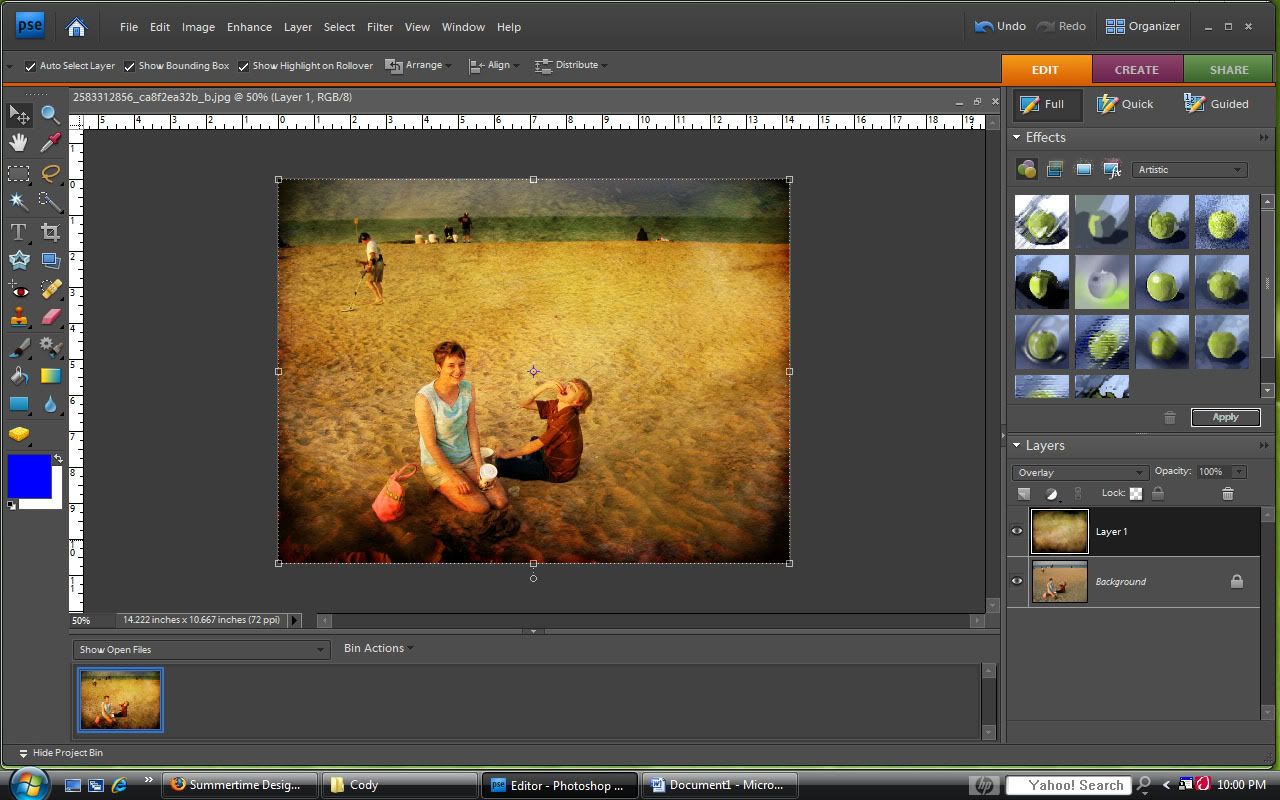
10. From the list that appears, choose "Overlay". You can also play around with the other options in this group and see what effects they create. You can select: "Soft Light," "Hard Light," "Vivid Light," "Linear Light," "Pin Light," or "Hard Mix."
11. You are almost finished.
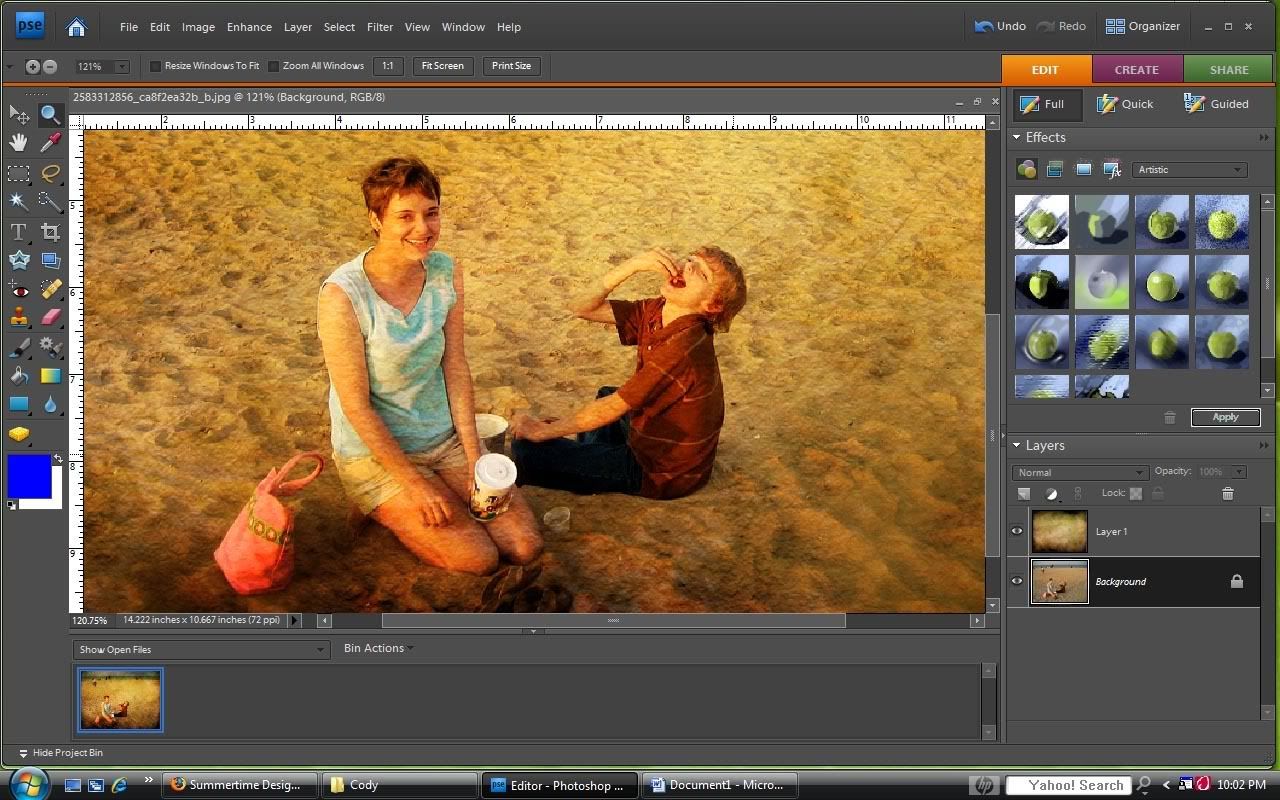
12. Next we will remove the texture from the bodies of the people, which gives a cleaner fresher look. I only remove the texture from the people that the picture focuses on, not those in the background. Here is a close up. It helps to zoom in to make sure you are careful and stay along the edges.
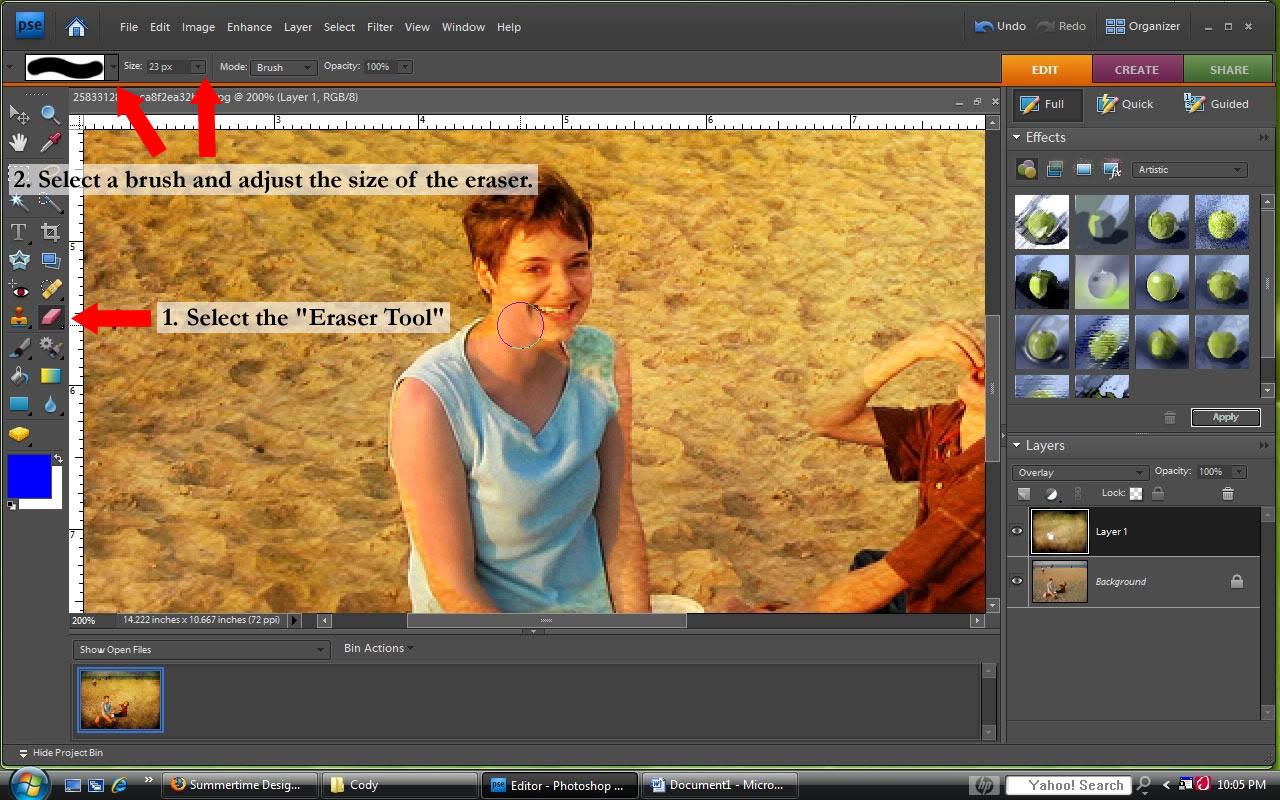
13. The erasing takes place on the texture layer, revealing the picture beneath. Make sure that you have the texture layer selected in the layer panel. To erase, select the "Eraser Tool". You can adjust which brush is selected (choose a round one, for example), and the size of the brush at the top of the viewing window. A smaller size helps around details (here I am using size 23).
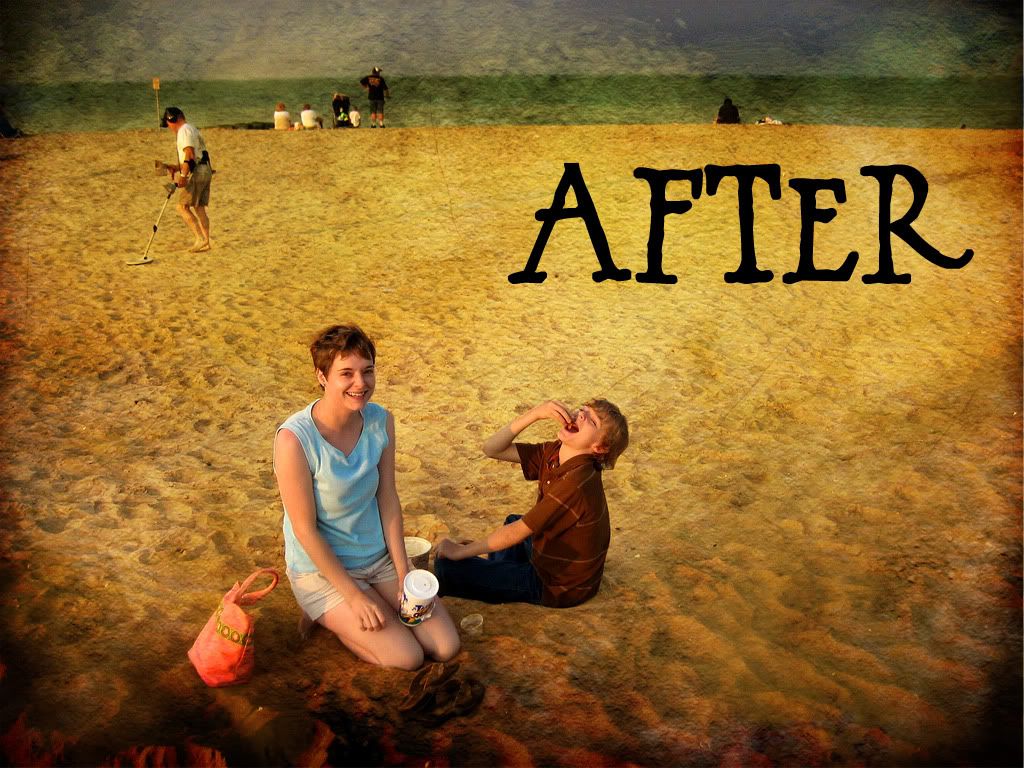
14. Tada! You are finished. Note: Summer uses the burn tool at the end of her tutorial, which you can do in Photoshop Elements. However, I did not use it because the texture I used created a similar effect on the edges of my picture that I was happy with.


No comments:
Post a Comment