I have not been posting what I have done every week, but thought I have done enough now to post what I have so far. I am using the kit "Take My Breath Away Collection" by Sweet Digi Designs that I bought with a coupon that I won at Gotta Pixel.
Showing posts with label challenge. Show all posts
Monday, July 6, 2009
My ABC Album
I am participating in the ABC Challenge at Gotta Pixel. Every week they provide templates for two letters.
I have not been posting what I have done every week, but thought I have done enough now to post what I have so far. I am using the kit "Take My Breath Away Collection" by Sweet Digi Designs that I bought with a coupon that I won at Gotta Pixel.


I have not been posting what I have done every week, but thought I have done enough now to post what I have so far. I am using the kit "Take My Breath Away Collection" by Sweet Digi Designs that I bought with a coupon that I won at Gotta Pixel.
Labels:
challenge,
digi-scrapping,
digiscrap,
digiscrapping,
digitial scrapbooking,
layout,
layouts
Tuesday, June 30, 2009
Scrap Simple Challenge #2
I love doing challenges. It is great inspiration to create pages you would not otherwise create, and lot of the time, use pictures that would go un-scrapped.
So I jumped in and did Simple Scrap #2 from the Simple Scrapper blog. Here are the rules:

I decided to stick with the freebie she offered because it instantly made me think of a photo that I took that I could scrap. My page is, again, so simple. I am not sure I am pleased with it, but the directions made what I could do with it very limiting.

So I jumped in and did Simple Scrap #2 from the Simple Scrapper blog. Here are the rules:
- Scrap a layout using ANY mini-kit from your stash or this freebie mini-kit [image below].
- You may include fonts, stitching or alphas but no papers or elements from outside the mini kit.
I decided to stick with the freebie she offered because it instantly made me think of a photo that I took that I could scrap. My page is, again, so simple. I am not sure I am pleased with it, but the directions made what I could do with it very limiting.
CREDITS:Journaling: "-Fourth of July, 2008- Every year Laurel hosts a big Independence Day extravaganza complete with a carnival, 5K, contests, lots of food, and fireworks. We were lucky enough to have Cody visiting and Mom, Dad, and Elise brought Cody down to enjoy the celebration. We had a lot of fun on the spinning rides, bumper cars, and slide. -Erin"
Kit: Circus Mini-Kit Freebie created by Pink Peacock Designs
Alpha: Alpha 04 created by Deca Designs
Labels:
challenge,
digi-scrapping,
digiscrap,
digiscrapping,
digitial scrapbooking,
layout,
layouts
Wednesday, June 24, 2009
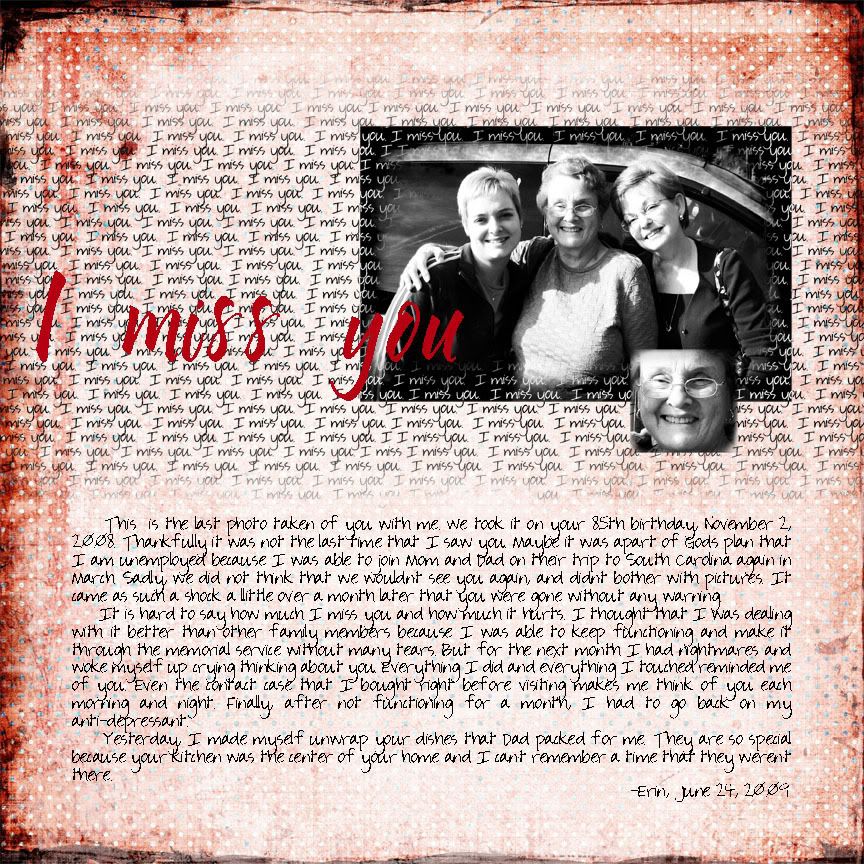
Last Photo Layout
I decided to participate in Digi Dare #138 at Digidares.com.
I really jumped in there---it was a tough challenge, but very cathartic I think.
CREDITS:
Paper - from "Tiny Jewels" by Julia Makotinsky
Fonts: "Socially Awkward" and "My Nerd" both by KevinandAmanda.com
I really jumped in there---it was a tough challenge, but very cathartic I think.
The DARE:
Life has its ups and downs, the happy moments, but also the sad ones. The ecstatic highs, and the painful lows.
My dare this week is to scrap about those lows (emotional or physical pain). Yes, you can do it.
Think about what happened, how was your reaction to it and how did it affect you? Did it make you stronger or are you still coping with it.The FLAIR:
-You can use a picture, or not. Use a stockphoto or something that symbolizes that pain.
-I want you to use your blending techniques. The papers, the elements, the picture, just blend something.
-Use the color that you associate with that pain.
"Last Photo"
This photo represents my pain because it is the last photo of us taken together. It is a reminder that things are not permanent, that people and things in life are ephemeral, they are just moments. I used blending modes on the photo once I turned it black and white to give it a stronger contrast between black and white...a little sharper. I tried to keep it subtle. For some reason I felt that black and red really represents how I feel. Red can be such a raw color, like an open wound.CREDITS:
Paper - from "Tiny Jewels" by Julia Makotinsky
Fonts: "Socially Awkward" and "My Nerd" both by KevinandAmanda.com
Labels:
challenge,
digi-scrapping,
digiscrap,
digiscrapping,
digitial scrapbooking,
layout,
layouts
Saturday, June 6, 2009
Creating Cut Outs and a Layout for a Challenge
Note: tutorial further down in this post.
I created a new layout for a challenge I have entered at Scrap That Idea! The post about the challenge is here. For this challenge we were given an inspiration and had to come up with a layout.
Here is the inspiration:

My translation of that is more literal than others. Mine is posted below, but you can visit the gallery and view everyone's layouts here.

I created a new layout for a challenge I have entered at Scrap That Idea! The post about the challenge is here. For this challenge we were given an inspiration and had to come up with a layout.
Here is the inspiration:
My translation of that is more literal than others. Mine is posted below, but you can visit the gallery and view everyone's layouts here.
Credits:
Papers for background and butterflies - "Simplicity" by A Work in Progress & "2 Little Bots" by Stacey's Scraps
I can offer you three Photoshop Elements (PSE) tutorials based off of this layout. The first I will discuss in this post called "cut outs" or what I did to create the butterfly shapes from the paper. The other two are how to create your own mask, like I did here using butterflies as you see in the pictures of my dog above; and how to create your own shadows. I will post the latter two tutorials later.
Tutorial
How to Create Cut Outs and Make Papers/Pictures into Shapes:
Okay, are you ready? Let's go. (Note: I try to show you every single step so this is really basic.)
To do this tutorial, you will need a paper or picture that you want to cut in a shape, and the shape you are going for. I am using butterflies like in my layout.
Part 1: Create a Cut Out/Shape
1.) Start by opening PSE and creating a new blank file. Make it big enough to hold your shape.

2.) Open the file that has the shape you want to use. My page is a bunch of butterflies.

3.) Select the "Rectangular Marquee Tool".

4.) Draw a rectangle around the shape you want to use.

5.) Select Edit > Copy (or Ctrl+C) to copy the shape.

6.) Click on your "new" blank file, and then go to Edit > Paste (or Ctrl+V).

7.) Now you have the shape pasted into your new page.


9.) Double-click on Background in the Layer Palette.

10.) Set the opacity of the background to 0%. This turns the background into a transparent layer.

11.) Select the shape layer.

12.) Select the Magic Wand Tool.

13.) Adjust the tolerance so that the Magic Wand Tool selects the entire background and none of the pixels of the shape you are trying to extract. Here I set the Tolerance to 30. Click on the the background (in this case the white area) to extract it.

14.) Click delete to get rid of the background.

15.) Right-click and choose deselect (or Ctrl+D) to get rid of the marching ants.

16.) Next, select the Eraser Tool.

17.) Use the eraser tool to erase any areas that did not delete when you used the magic wand.

Now you have created what is called a "mask" in Photoshop. This mask is the shape that we use to cut our paper or photo.
Part 2: Make a Paper/Picture into a Shape
18.) Open the paper or picture that you are going to mask using the shape you just cut out.

19.) Select the Move Tool.

20.) Click on the shape. While still holding the mouse button down, drag the shape onto the paper or picture.

21.) In this scenario, the paper is the background. We want it to be a layer, so we will change that. To do that right-click on the background layer in the layer palette.

22.) In the menu that pops up, select "Layer From Background."

23.) In the box that opens, you can give this new "layer" (the paper layer) a name and click "Ok;" or bypass the naming and just click "Ok."

24.) Now you can see that the paper is its own layer.

25.) Drag the shape layer below the paper layer.

26.) Now, select the paper layer (the top layer). Then, go to Layer > Group With Previous (or Ctrl+G).

Below I have zoomed in on the results.

27.) Next, right click on the paper layer and choose "Merge Down."

28.) You are finished. The paper or picture is now in the shape of your cut out (AKA mask).

Credit: Brown paper from "Simplicity" by A Work in Progress
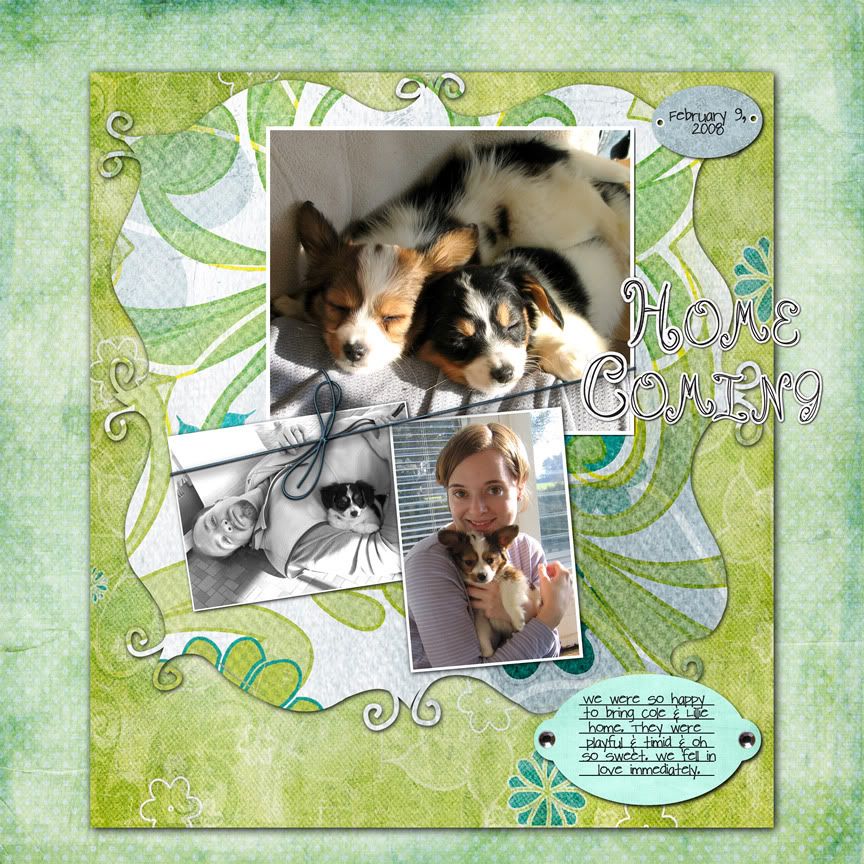
I used the same technique from Part 2 to create the mat behind the pictures in my last layout, "Home Coming."

Tutorial
How to Create Cut Outs and Make Papers/Pictures into Shapes:
Okay, are you ready? Let's go. (Note: I try to show you every single step so this is really basic.)
To do this tutorial, you will need a paper or picture that you want to cut in a shape, and the shape you are going for. I am using butterflies like in my layout.
Part 1: Create a Cut Out/Shape
1.) Start by opening PSE and creating a new blank file. Make it big enough to hold your shape.
5.) Select Edit > Copy (or Ctrl+C) to copy the shape.
6.) Click on your "new" blank file, and then go to Edit > Paste (or Ctrl+V).
7.) Now you have the shape pasted into your new page.
8.) Now you can close the shape page and simply view your "new" blank file that now has your shape on it.
9.) Double-click on Background in the Layer Palette.
10.) Set the opacity of the background to 0%. This turns the background into a transparent layer.
11.) Select the shape layer.
12.) Select the Magic Wand Tool.
13.) Adjust the tolerance so that the Magic Wand Tool selects the entire background and none of the pixels of the shape you are trying to extract. Here I set the Tolerance to 30. Click on the the background (in this case the white area) to extract it.
14.) Click delete to get rid of the background.
15.) Right-click and choose deselect (or Ctrl+D) to get rid of the marching ants.
16.) Next, select the Eraser Tool.
17.) Use the eraser tool to erase any areas that did not delete when you used the magic wand.
Part 2: Make a Paper/Picture into a Shape
18.) Open the paper or picture that you are going to mask using the shape you just cut out.
19.) Select the Move Tool.
20.) Click on the shape. While still holding the mouse button down, drag the shape onto the paper or picture.
21.) In this scenario, the paper is the background. We want it to be a layer, so we will change that. To do that right-click on the background layer in the layer palette.
22.) In the menu that pops up, select "Layer From Background."
23.) In the box that opens, you can give this new "layer" (the paper layer) a name and click "Ok;" or bypass the naming and just click "Ok."
24.) Now you can see that the paper is its own layer.
25.) Drag the shape layer below the paper layer.
26.) Now, select the paper layer (the top layer). Then, go to Layer > Group With Previous (or Ctrl+G).
Below I have zoomed in on the results.
27.) Next, right click on the paper layer and choose "Merge Down."
28.) You are finished. The paper or picture is now in the shape of your cut out (AKA mask).
I used the same technique from Part 2 to create the mat behind the pictures in my last layout, "Home Coming."
Credits:
- Mat from "My Secret Garden" by creations by Rachael at http://www.funkyplaygrounddesigns.com
- Floral Papers from "Spontaneous Delight" by Carrie Stephens (see post of layout above for credits)
- Mat from "My Secret Garden" by creations by Rachael at http://www.funkyplaygrounddesigns.com
- Floral Papers from "Spontaneous Delight" by Carrie Stephens (see post of layout above for credits)
Labels:
challenge,
cut outs,
digi-scrapping,
digiscrap,
digiscrapping,
digitial scrapbooking,
layout,
mask,
shape,
tutorial
Subscribe to:
Posts (Atom)